
 In March 2013, I got a message from my niece Mari that she wanted to talk about a ‘chest’ for her husband – Bobie’s nephew Jason. He is a knife collector and she thought it about time that he had proper storage for his knives. She had come across the venerable Gerstner Chests – classic tool chests built in Ohio since 1906 (gerstnerusa.com). She wondered if there were others like this or if I might be interested in a commission to build a chest for his birthday in July.
A Gerstner Classic
I jumped at the chance. Some facets of the build were similar to things I have done, but others would give me a chance to learn new skills. That nice balance between pushing myself ahead, but still within the range of what I thought I could handle – after all, it would be unacceptable to mess up a birthday present.
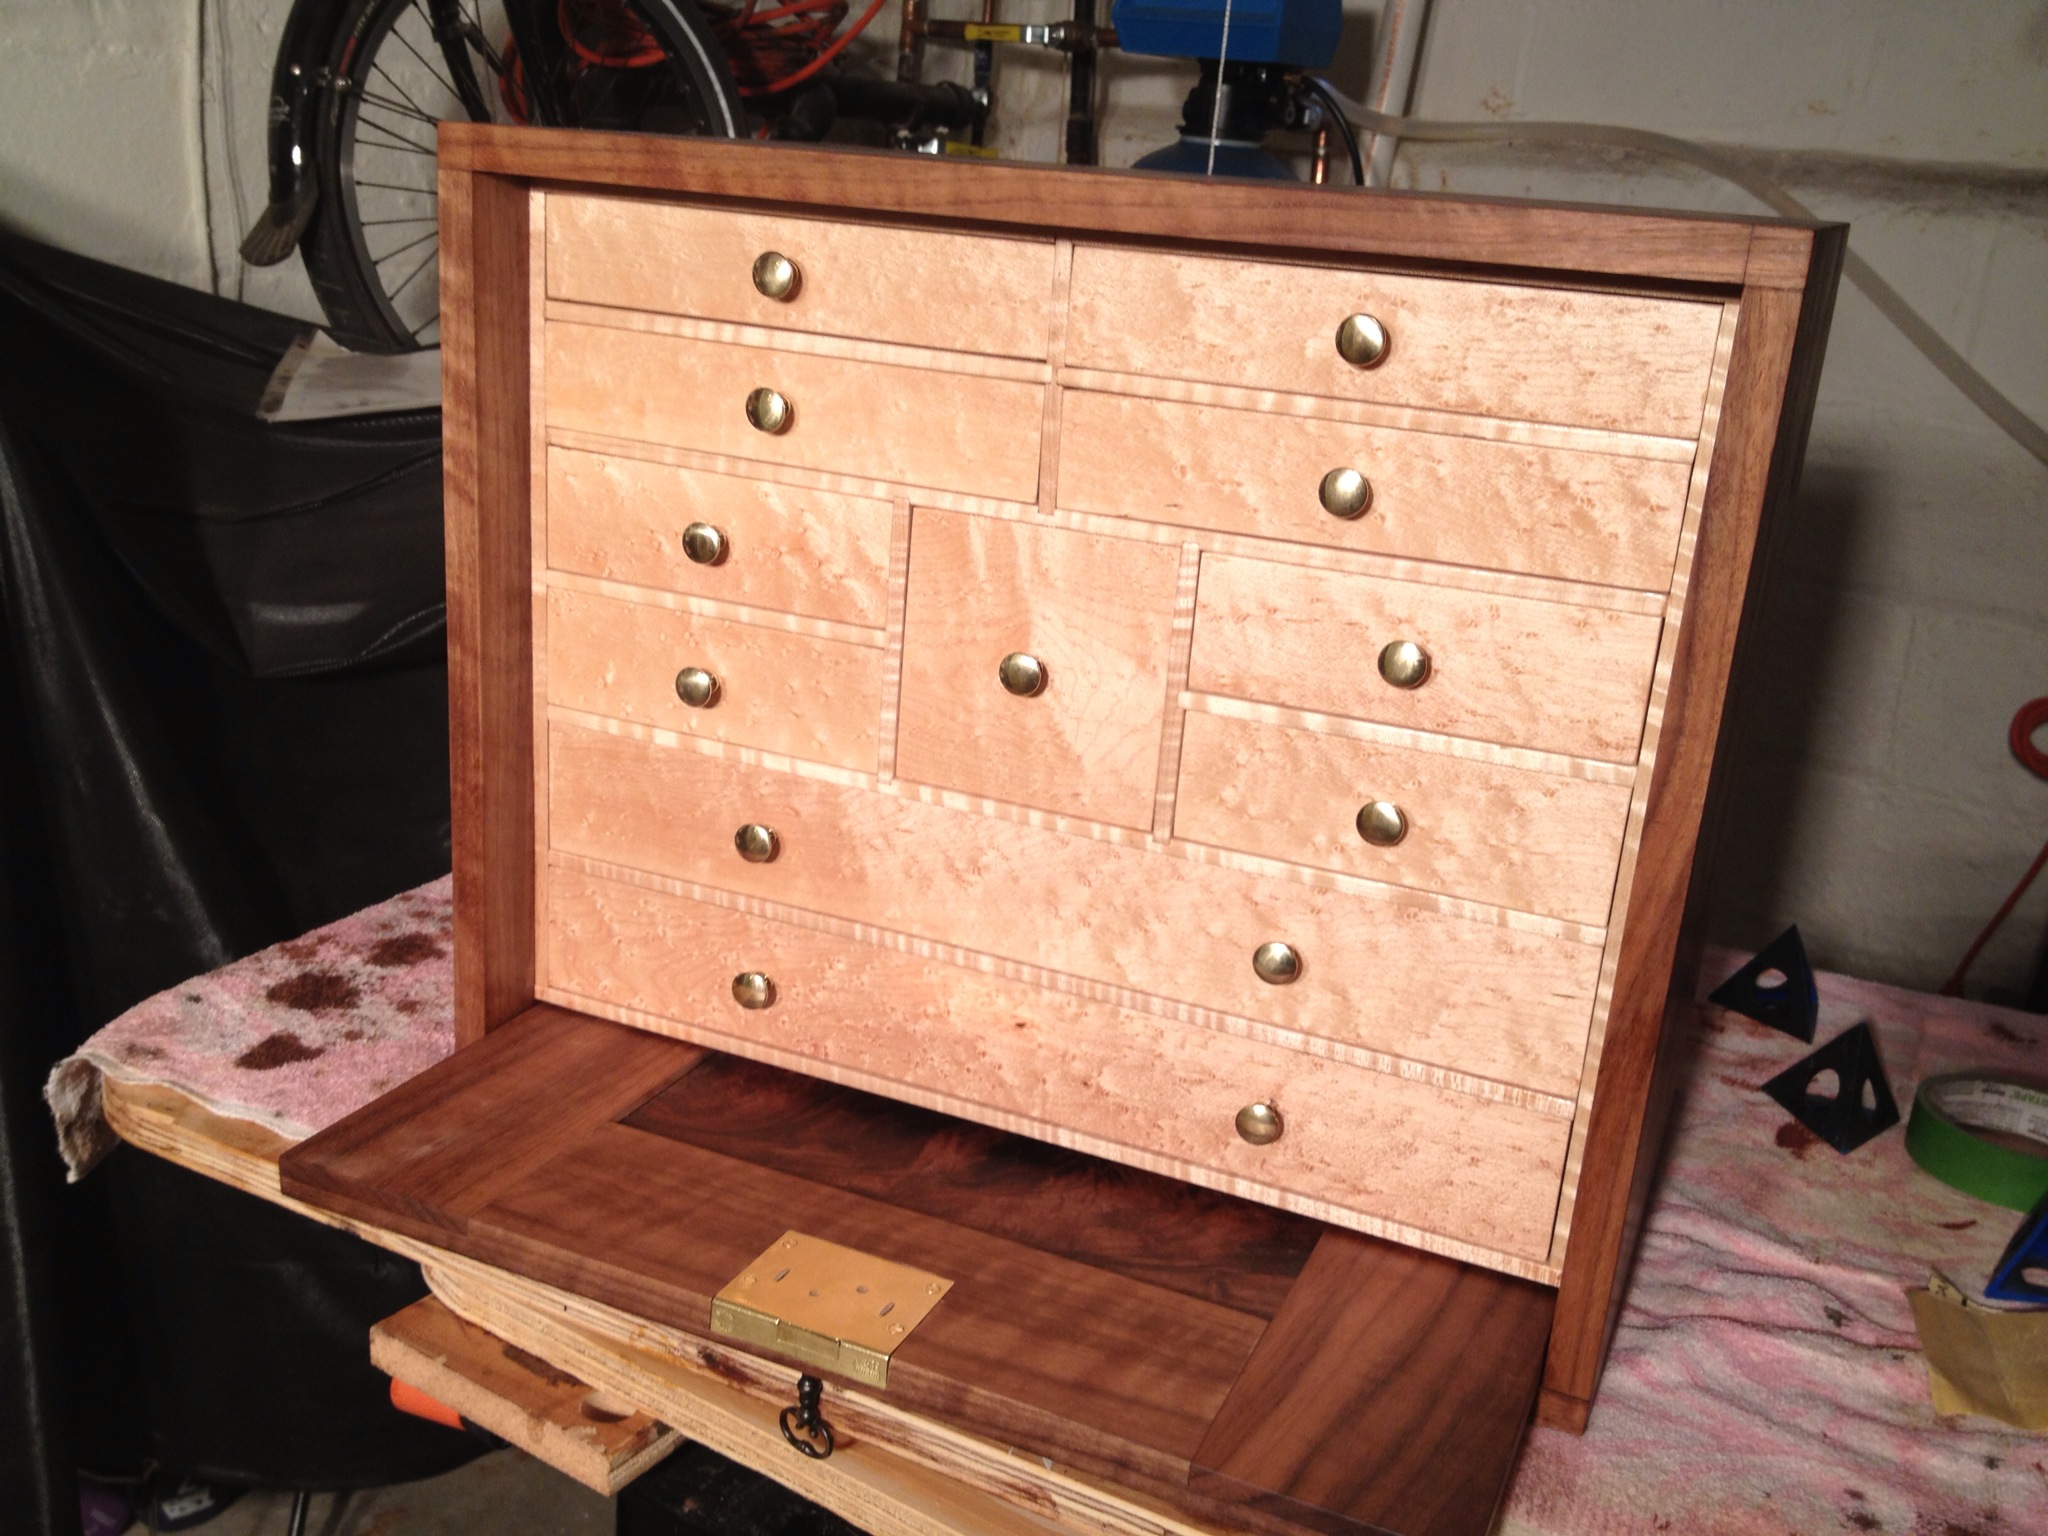
Mari and I talked about what he might like and appreciate in terms of wood, details and size. She sent pictures of his collection, so I had a good idea of the need. The Gerstner chests have a few different sizes and styles, as well as different drawer configurations. I liked the idea of a chest that would lock (keep the kids out) and was portable to easily carry around to show off the collection. Jason is a budding woodworker, so I wanted to build it in a way that he would appreciate – dovetailed case, gorgeous wood, ‘close to the wood’ finish, attention to detail.
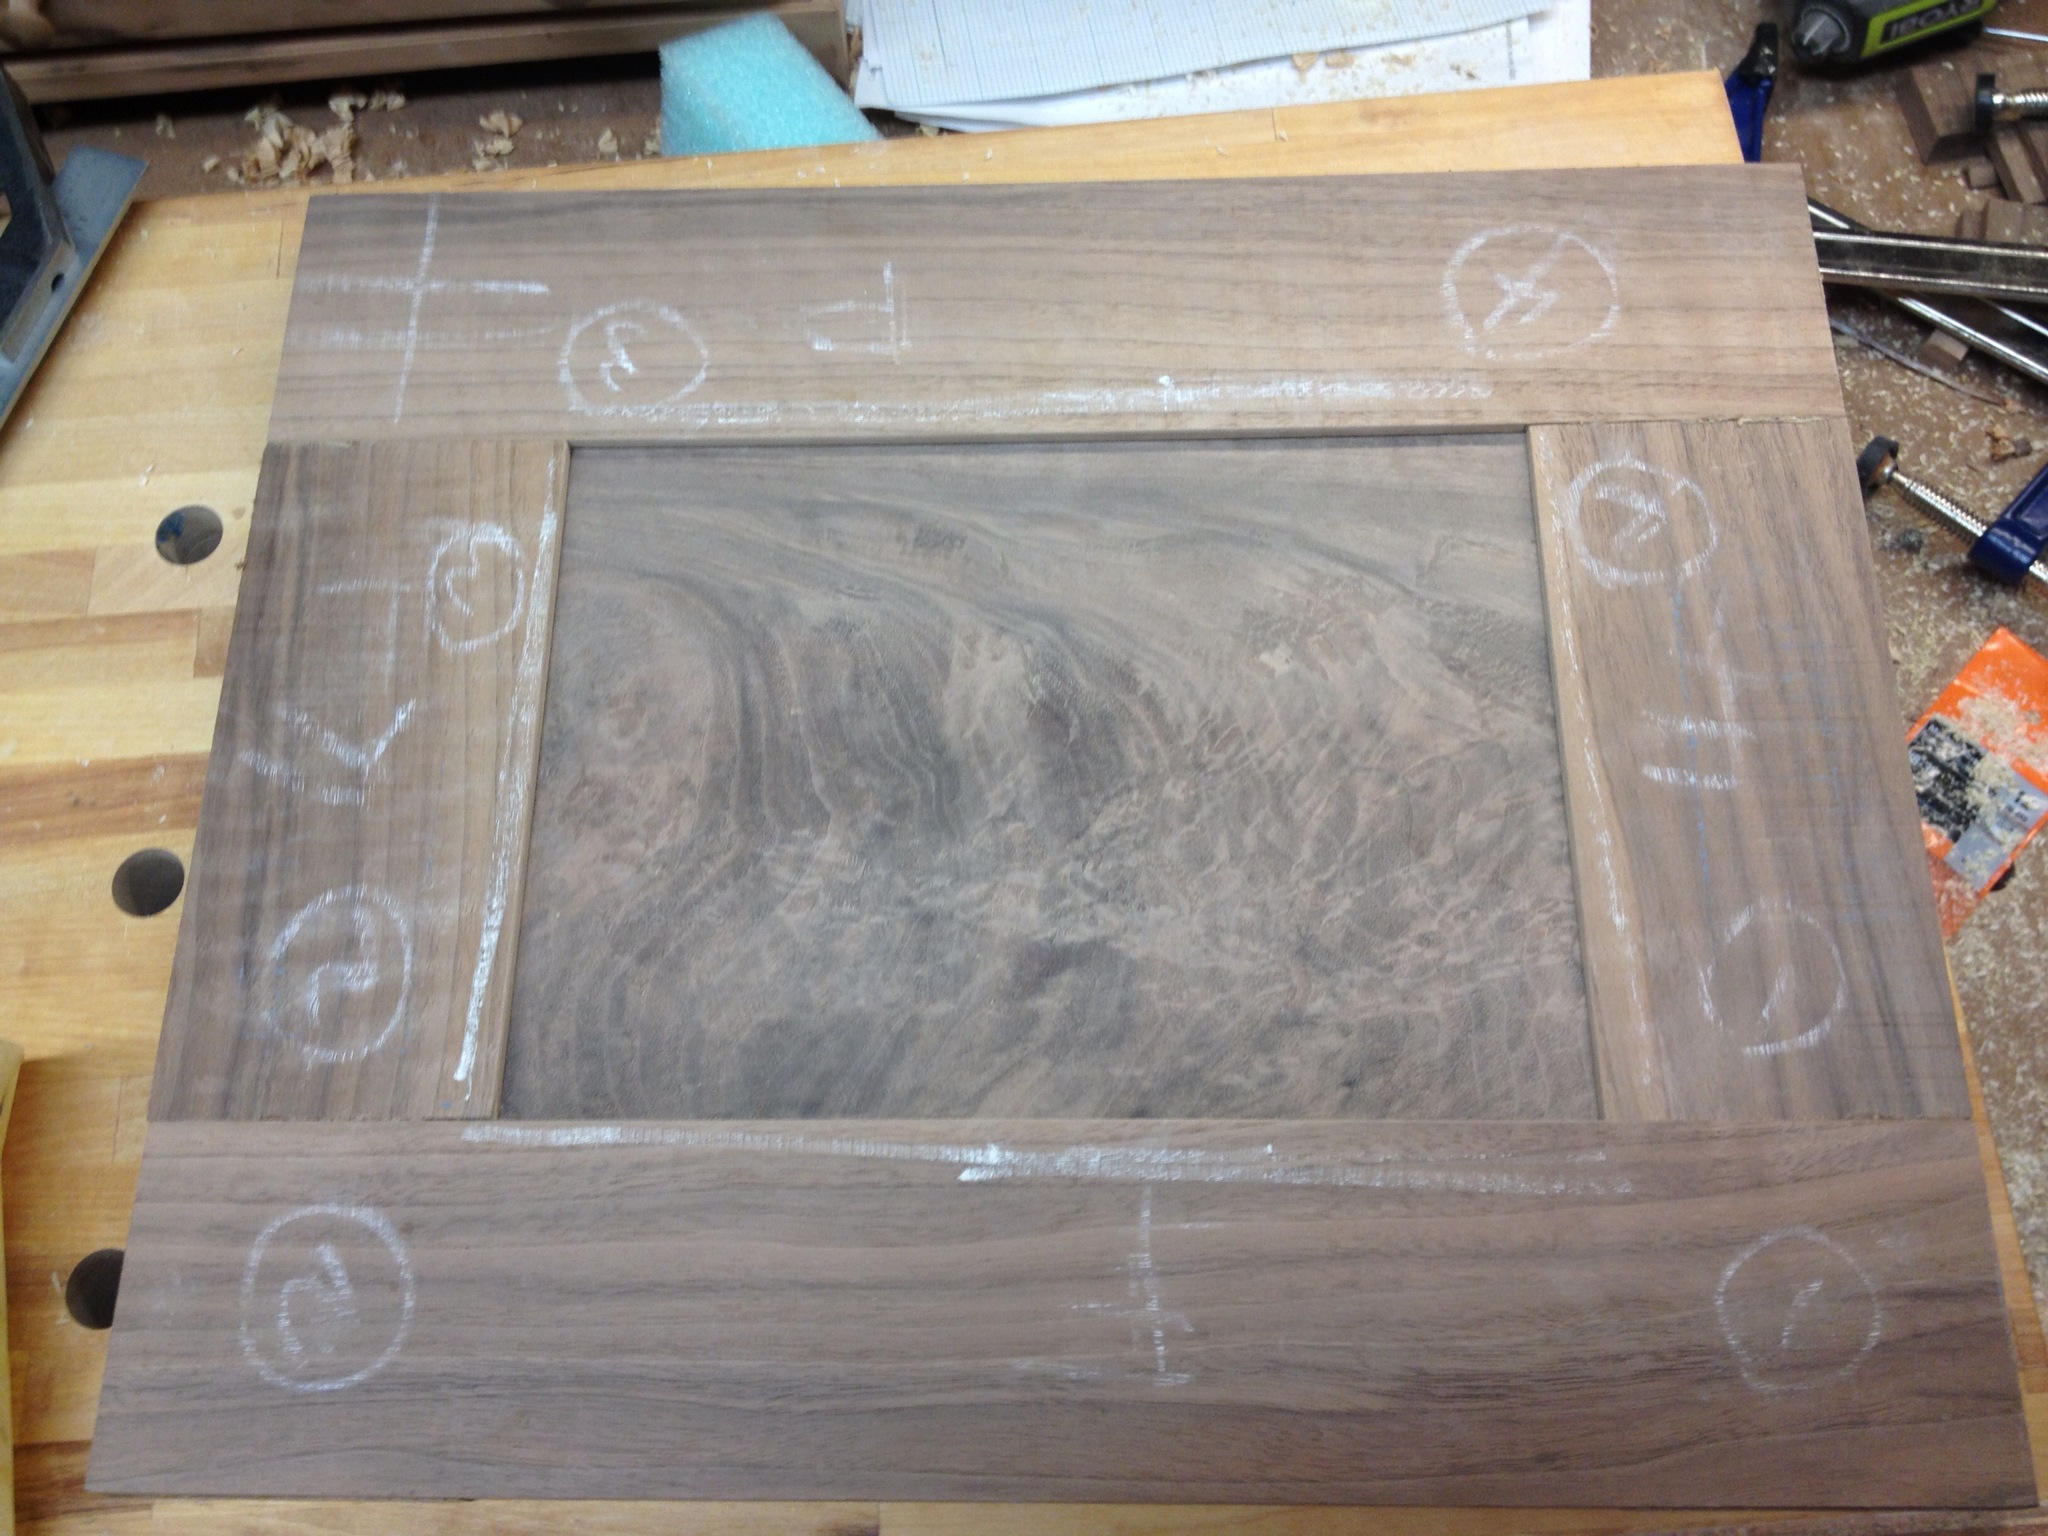
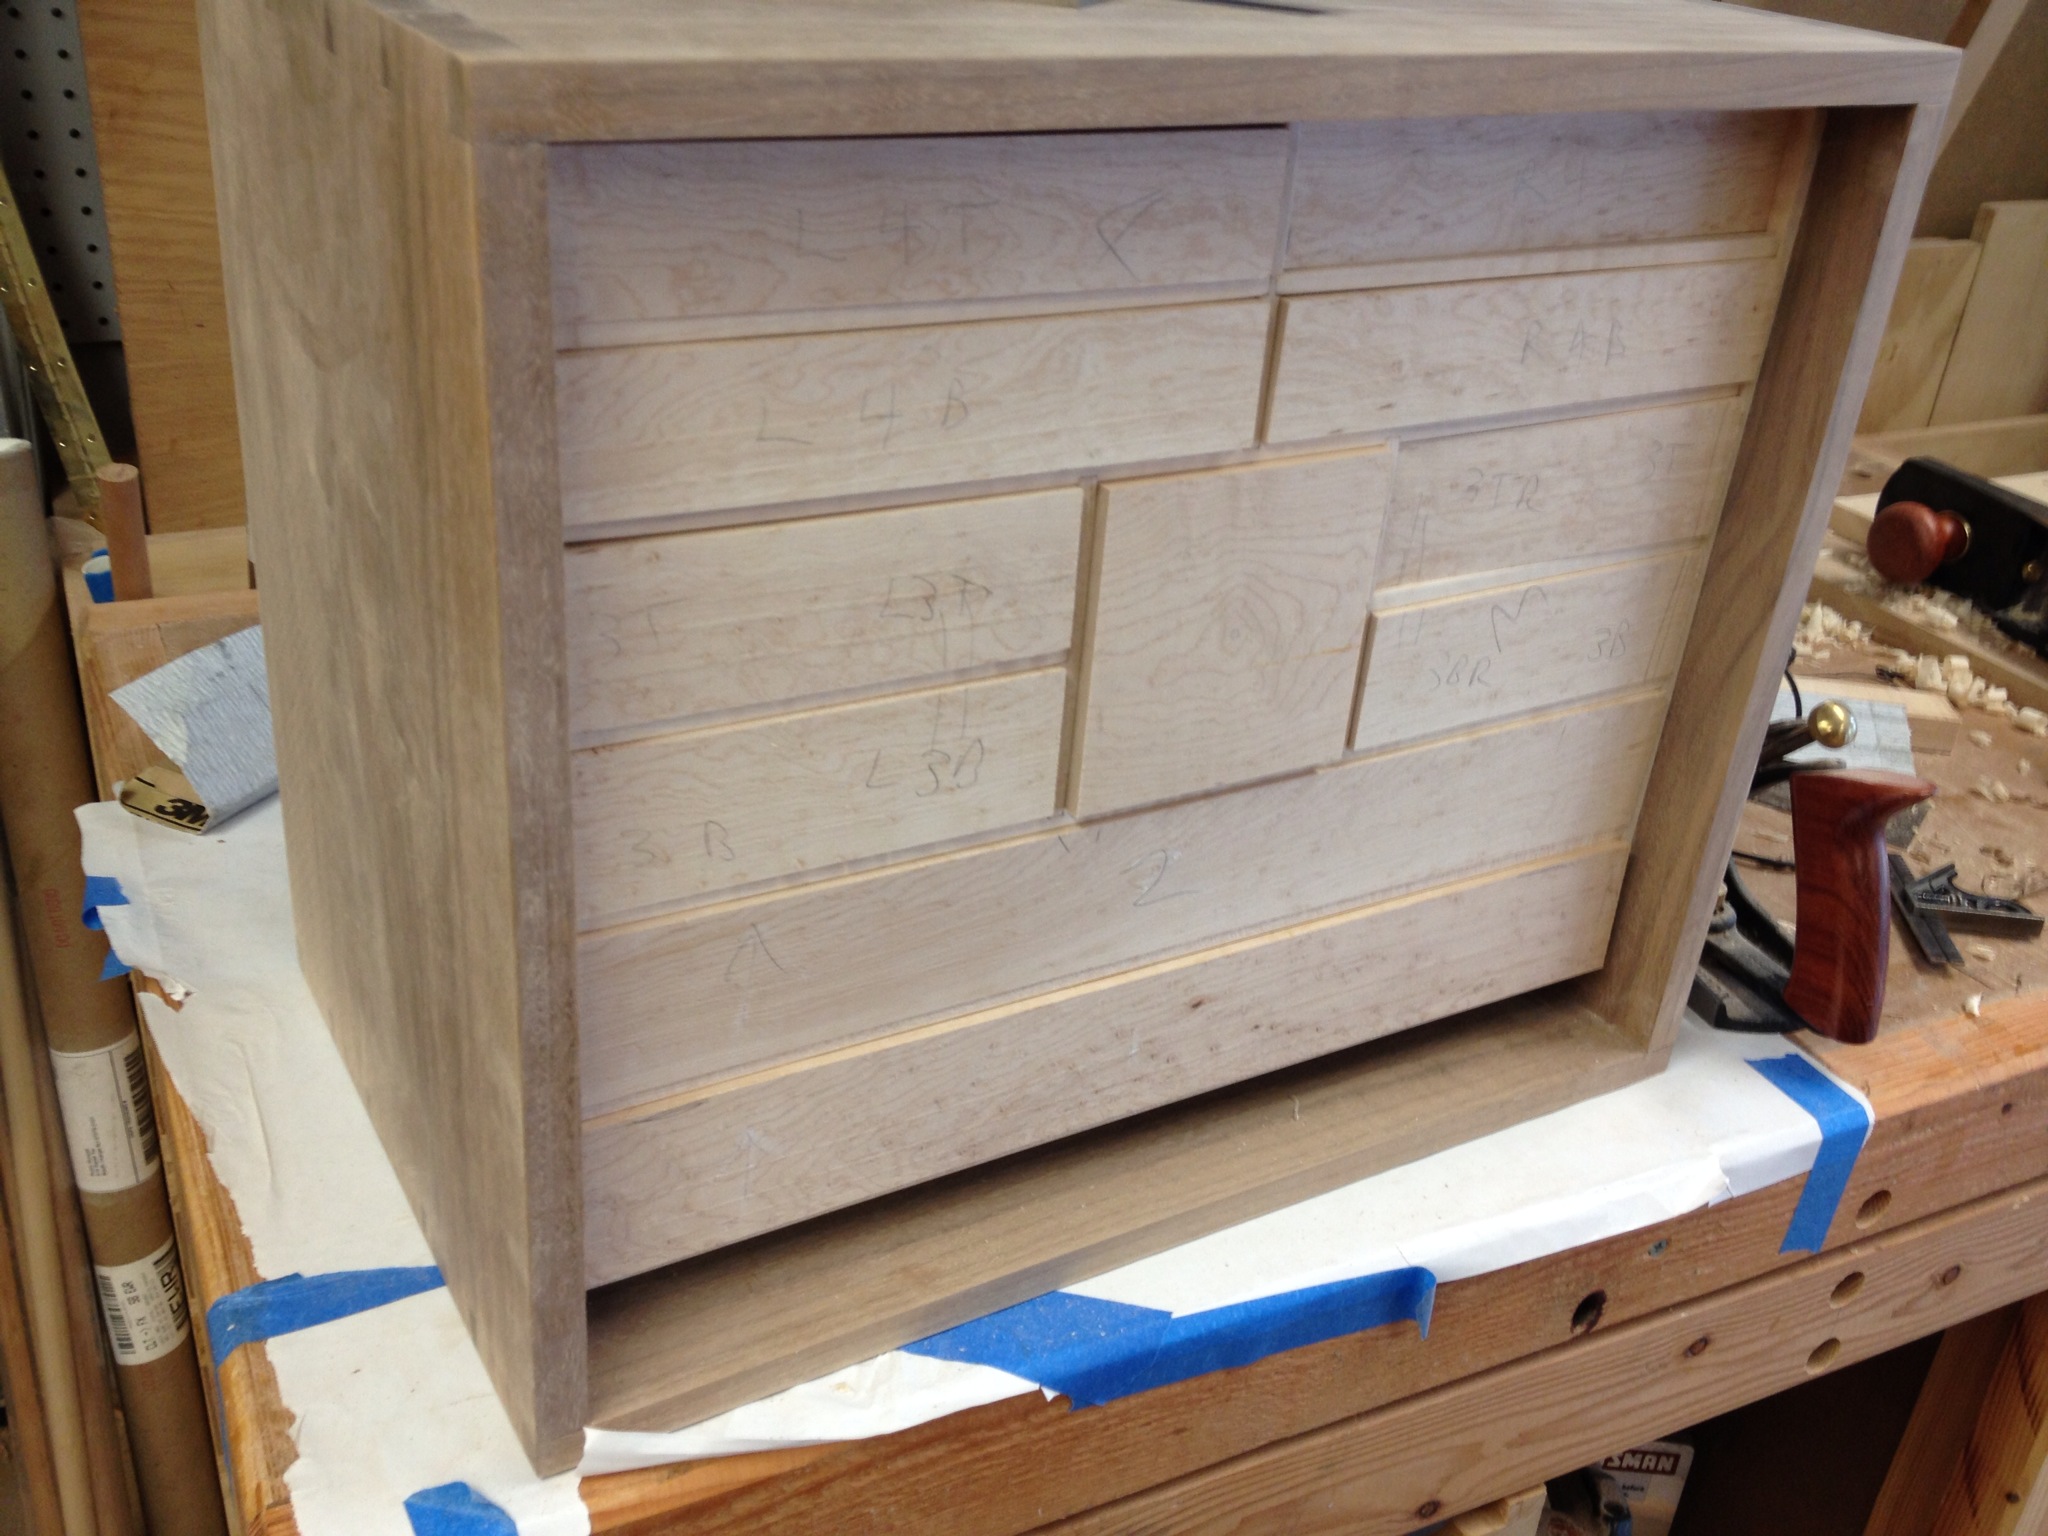
Though I decided almost immediately to build the case from walnut and the drawers from bird’s eye maple, I also decided I would build a prototype first with the case from poplar and the drawers tiger maple. I wanted to work out the size, but in particular, the drawer gallery and drawers. While I’ve made a few small drawers, I hadn’t made a drawer gallery like this.
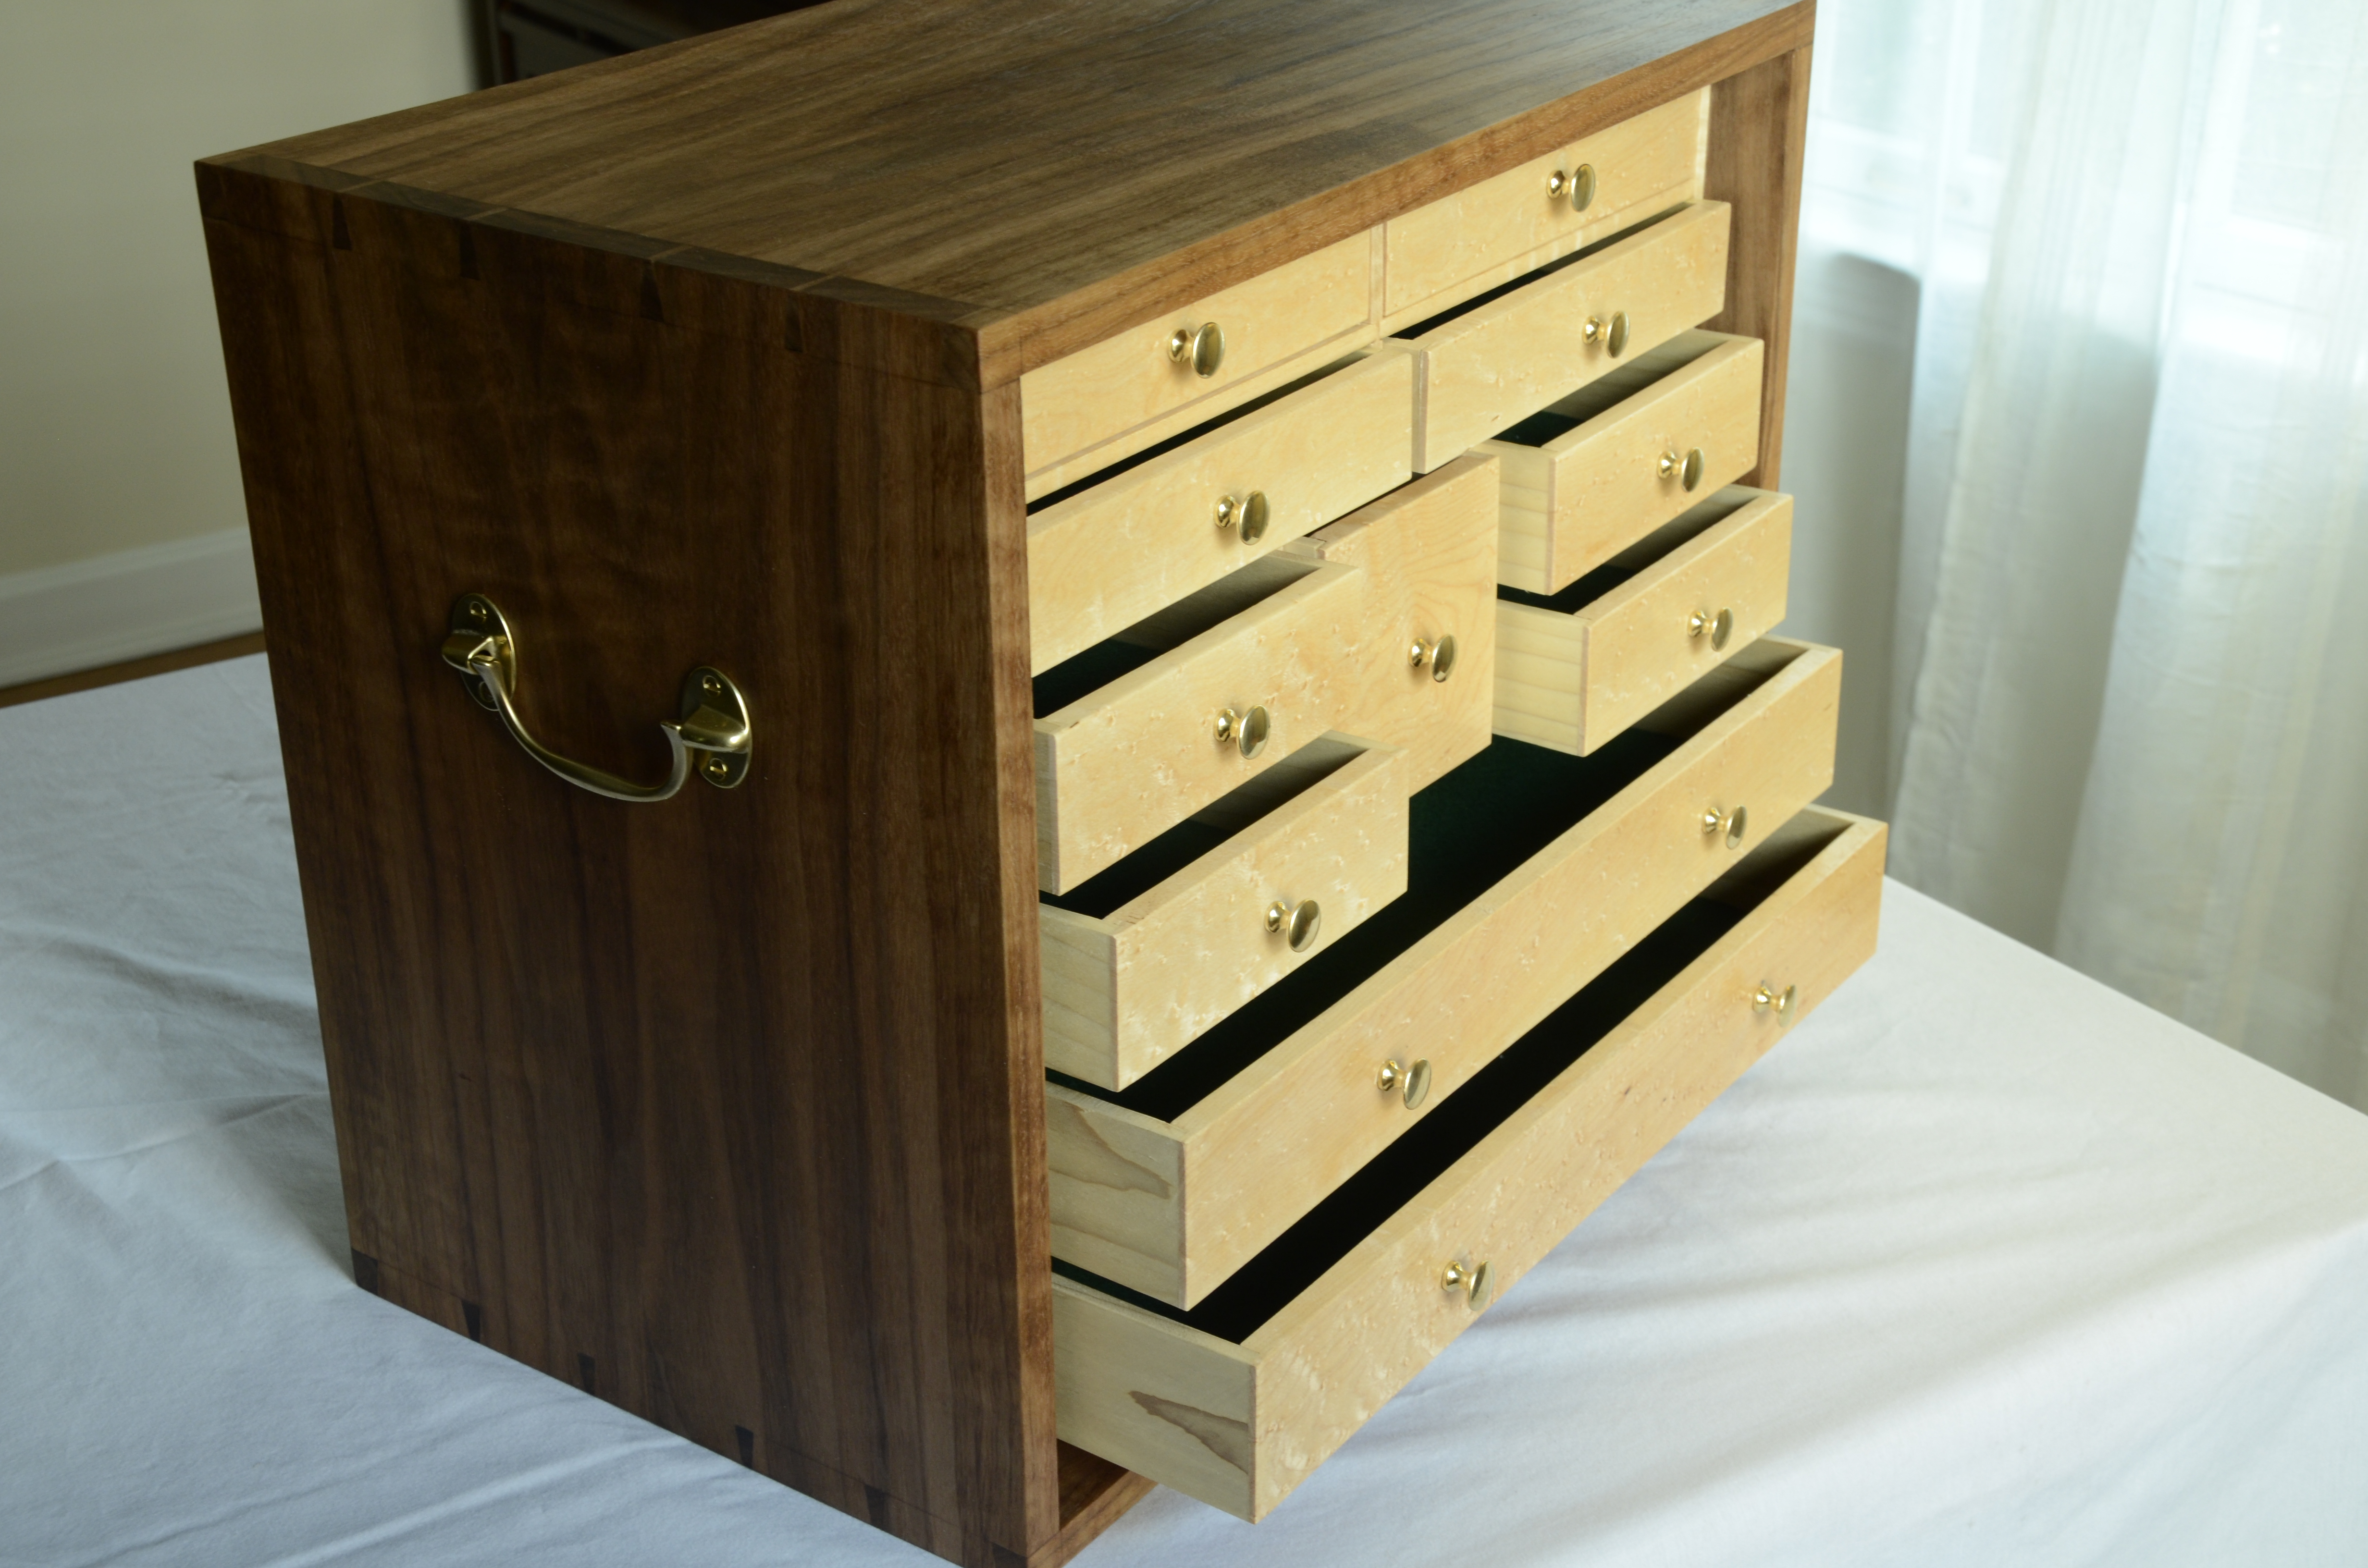
The chest has a removable, lockable door on the front with a matching fixed panel on the back. I’ve done some veneering, so I knew I could do eye-catching center panels for the doors. For the prototype I used maple burl veneer. I made the poplar case with box joints which are quick and easy and solid. The gallery took a look of ‘futzing’ with, but in the end, wasn’t that difficult, just requiring precision. I was able to knock out the drawers quickly and with my growing comfort with hand planes, I was able to fit them pretty easily.
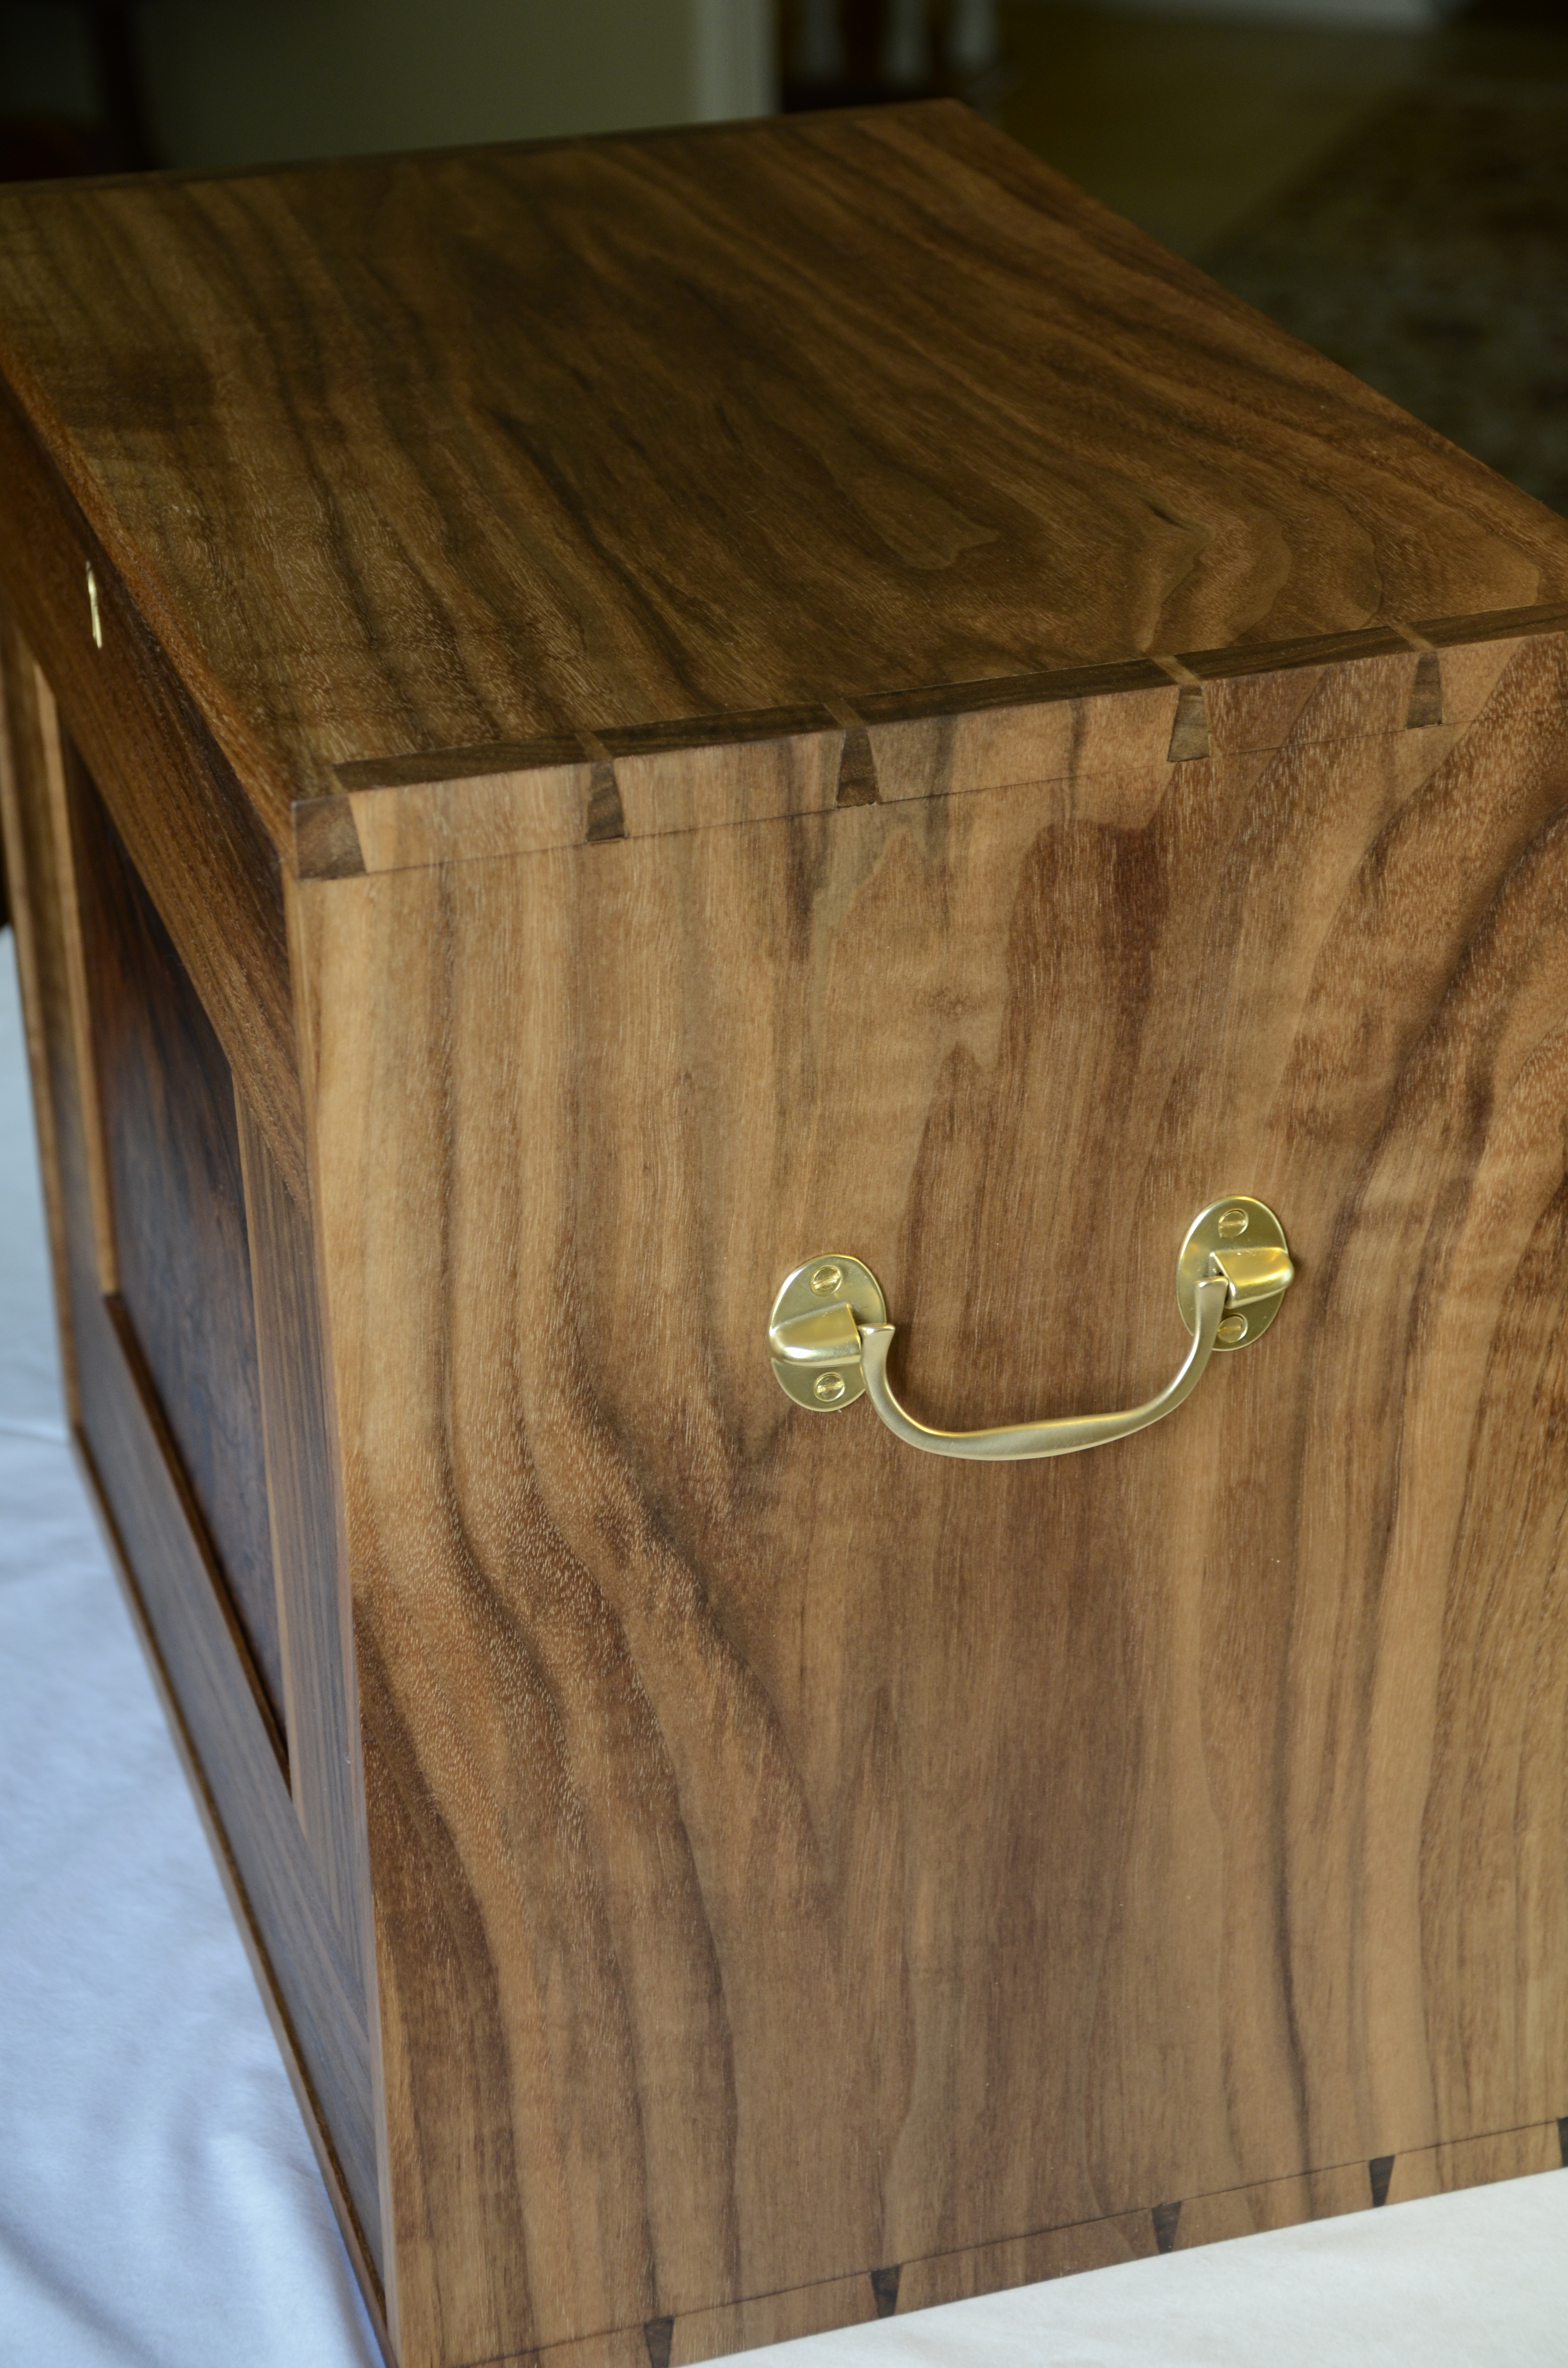
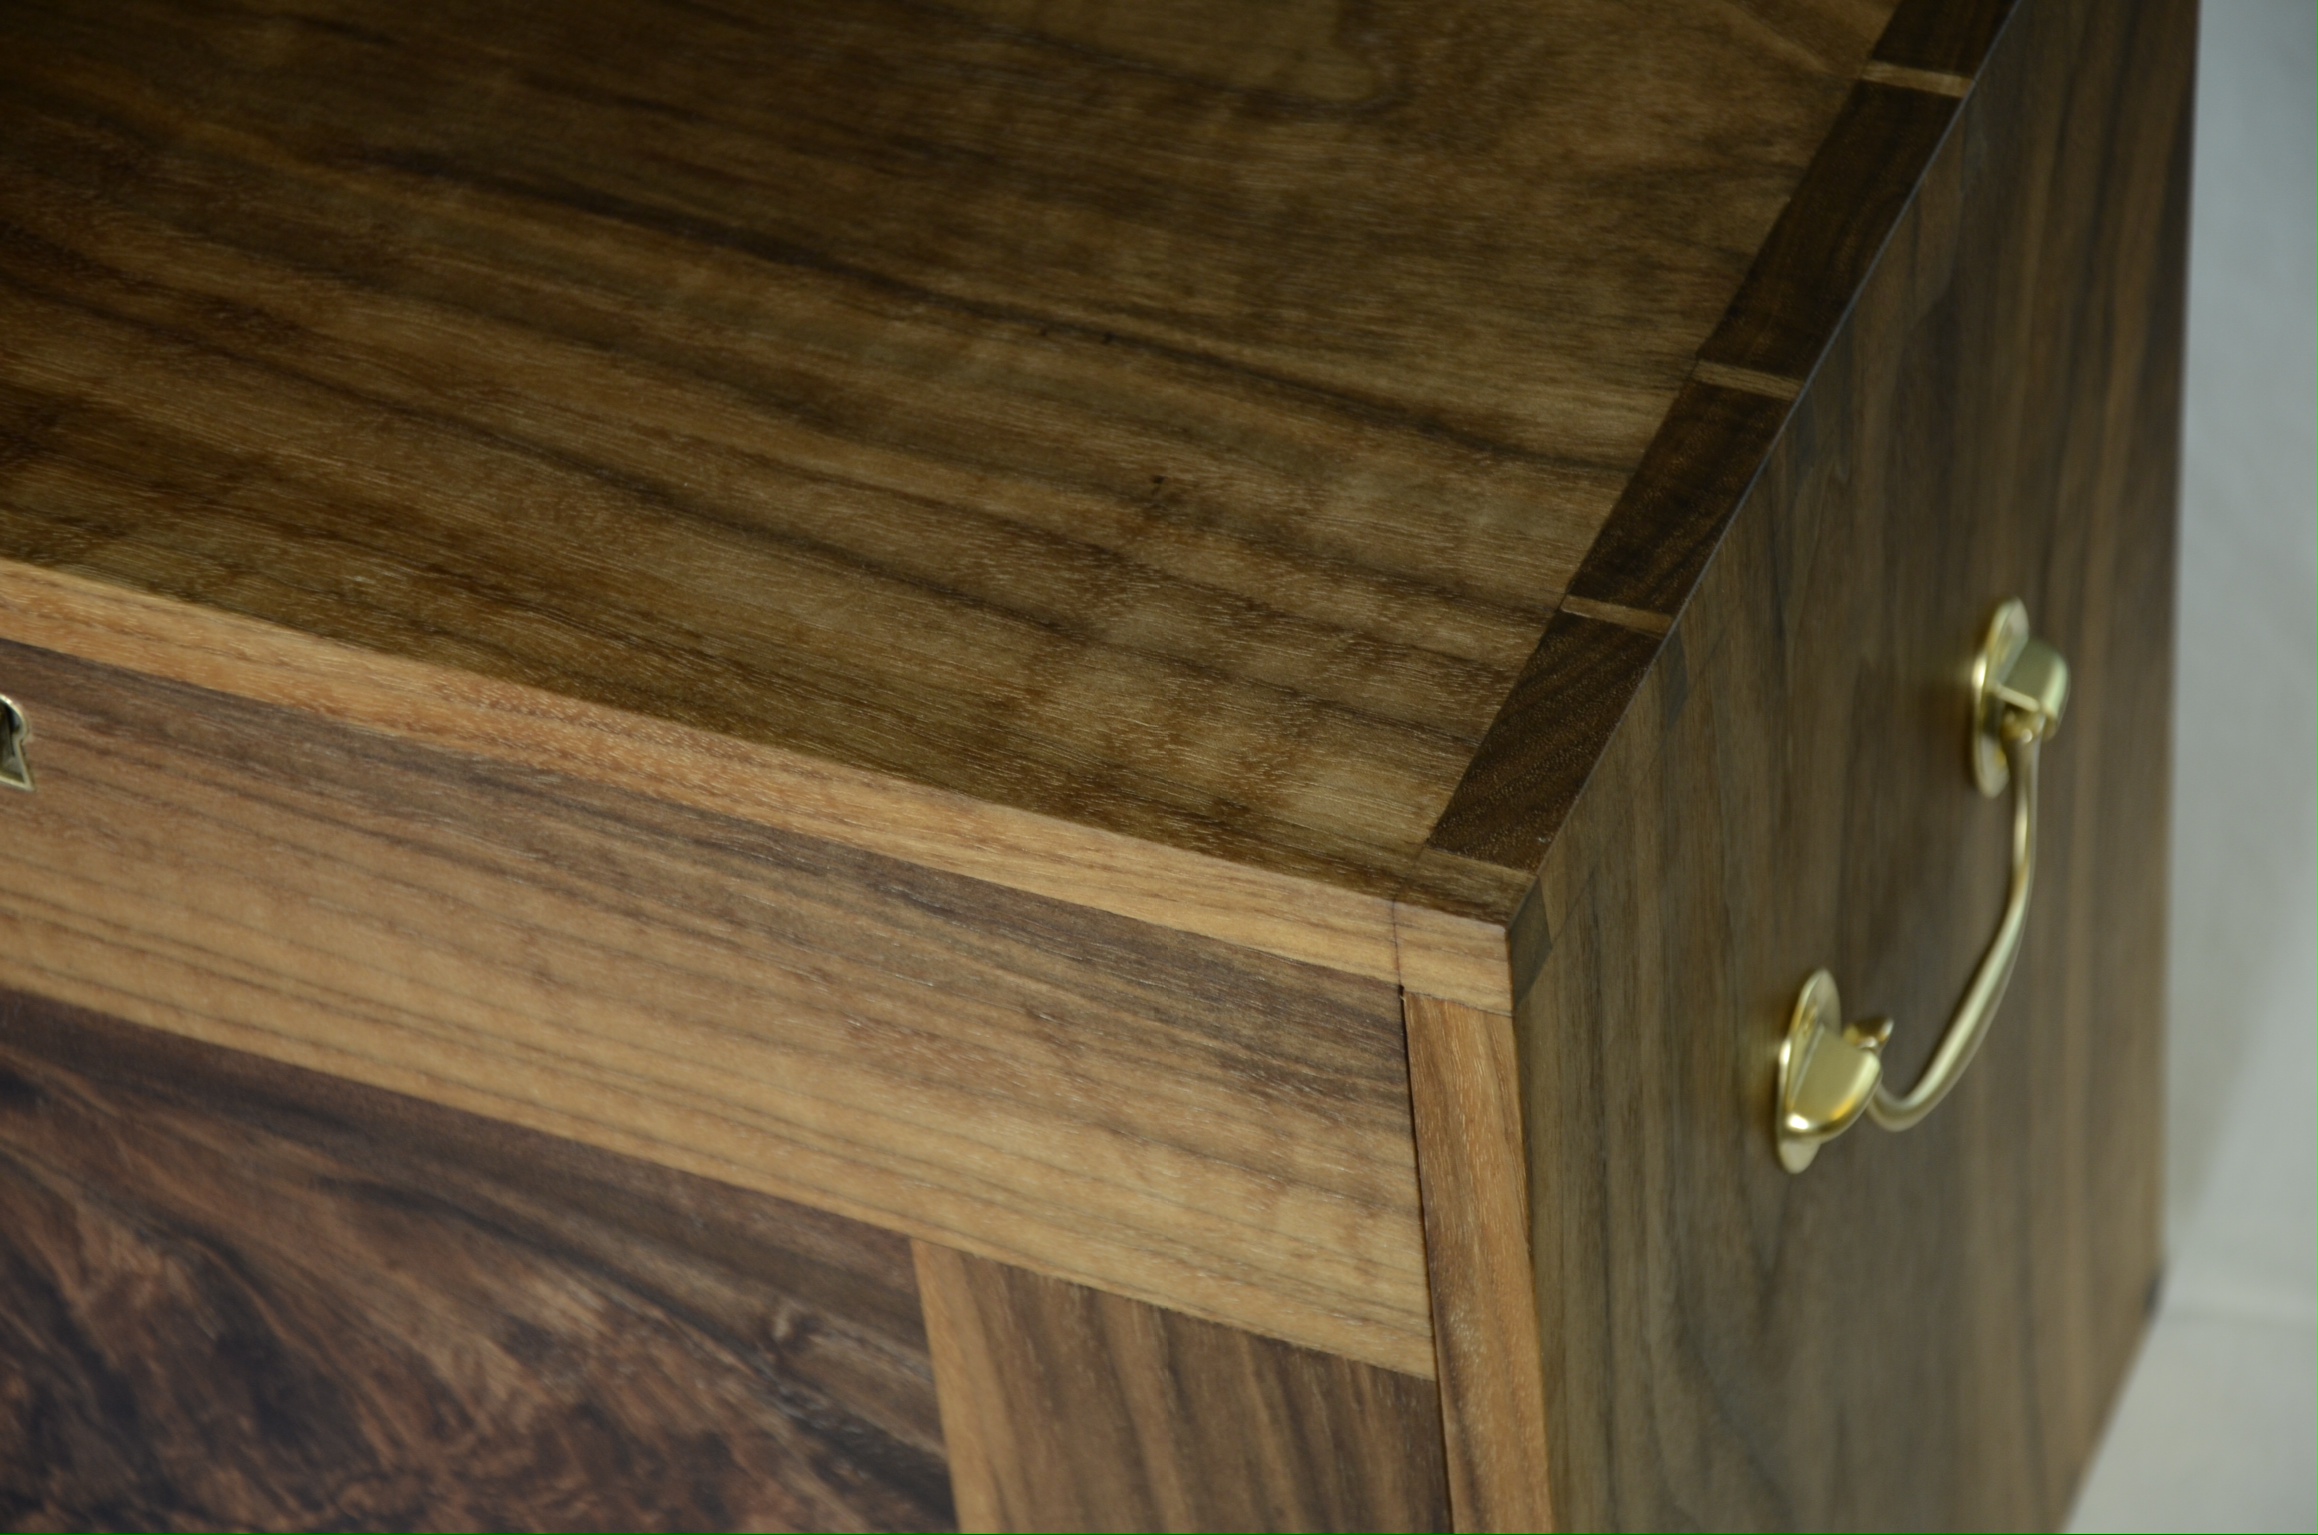
I did a lot of hunting for hardware – handles for the sides, small knobs for the drawers and a half-mortise lockset. I found pieces that I liked from different suppliers online. I decided to use brass pieces, but I don’t like the shiny lacquered finish, so I stripped the pieces after I got them.
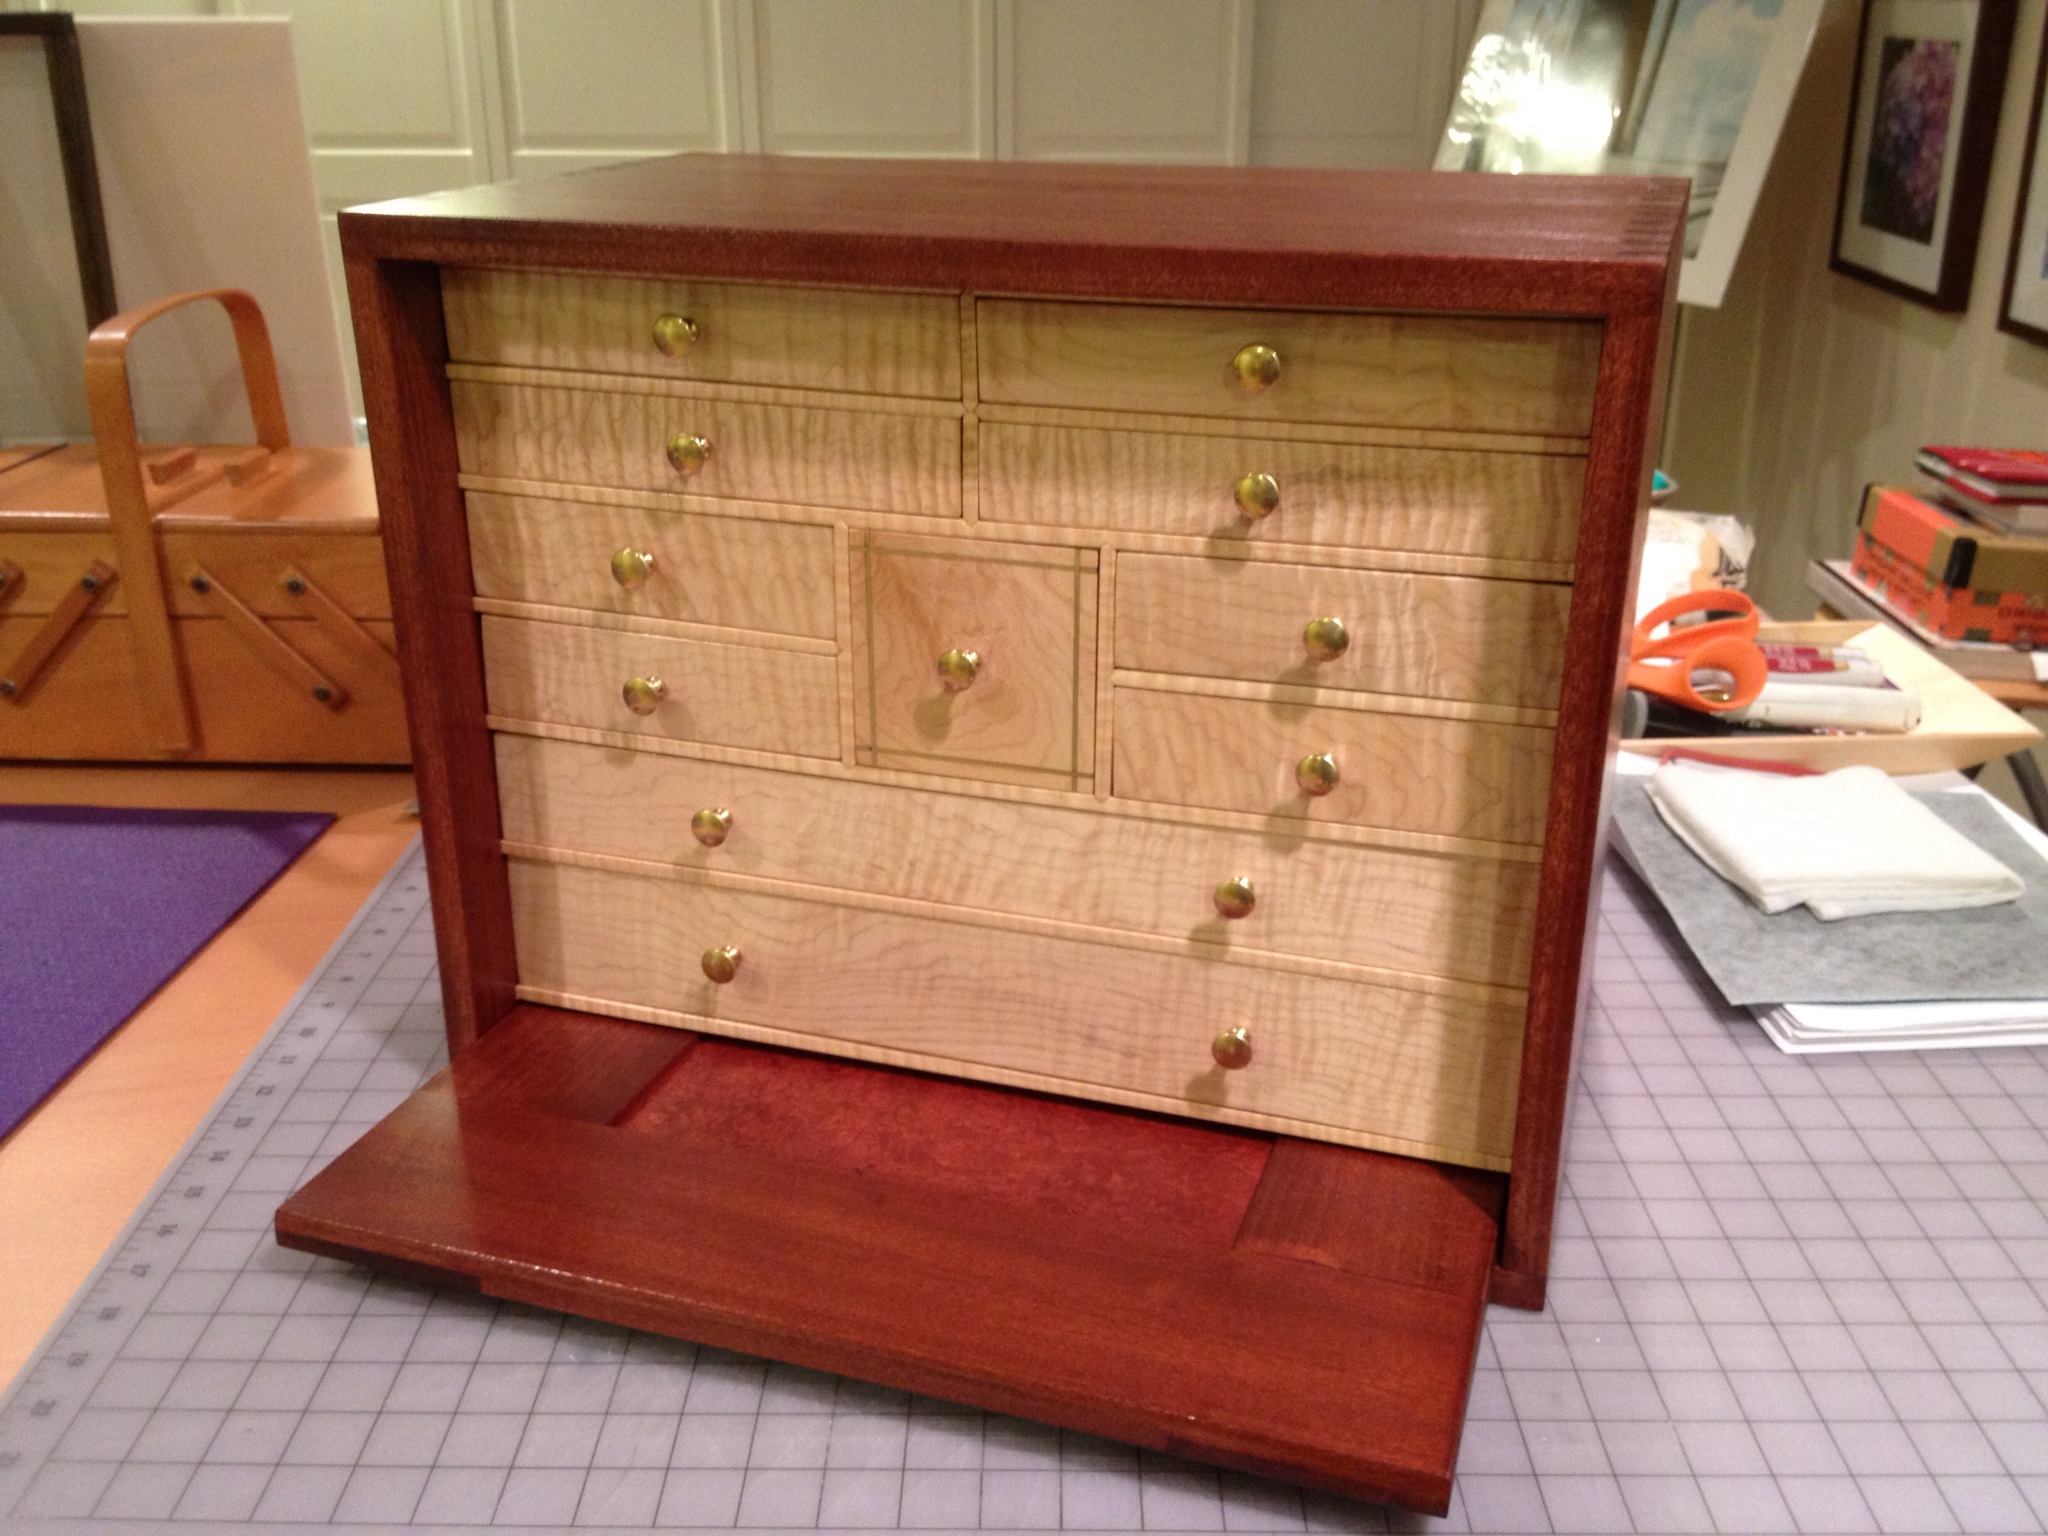 Making the prototype accomplished just what I needed – sorting out the joinery, confirming the size, making sure the drawer layout worked, figuring out the finish, etc. With the work it took to make the prototype, I did want it to be a solid, usable piece. I decided to finish it with a cherry stain to produce some drama between a darker case and lighter interior.
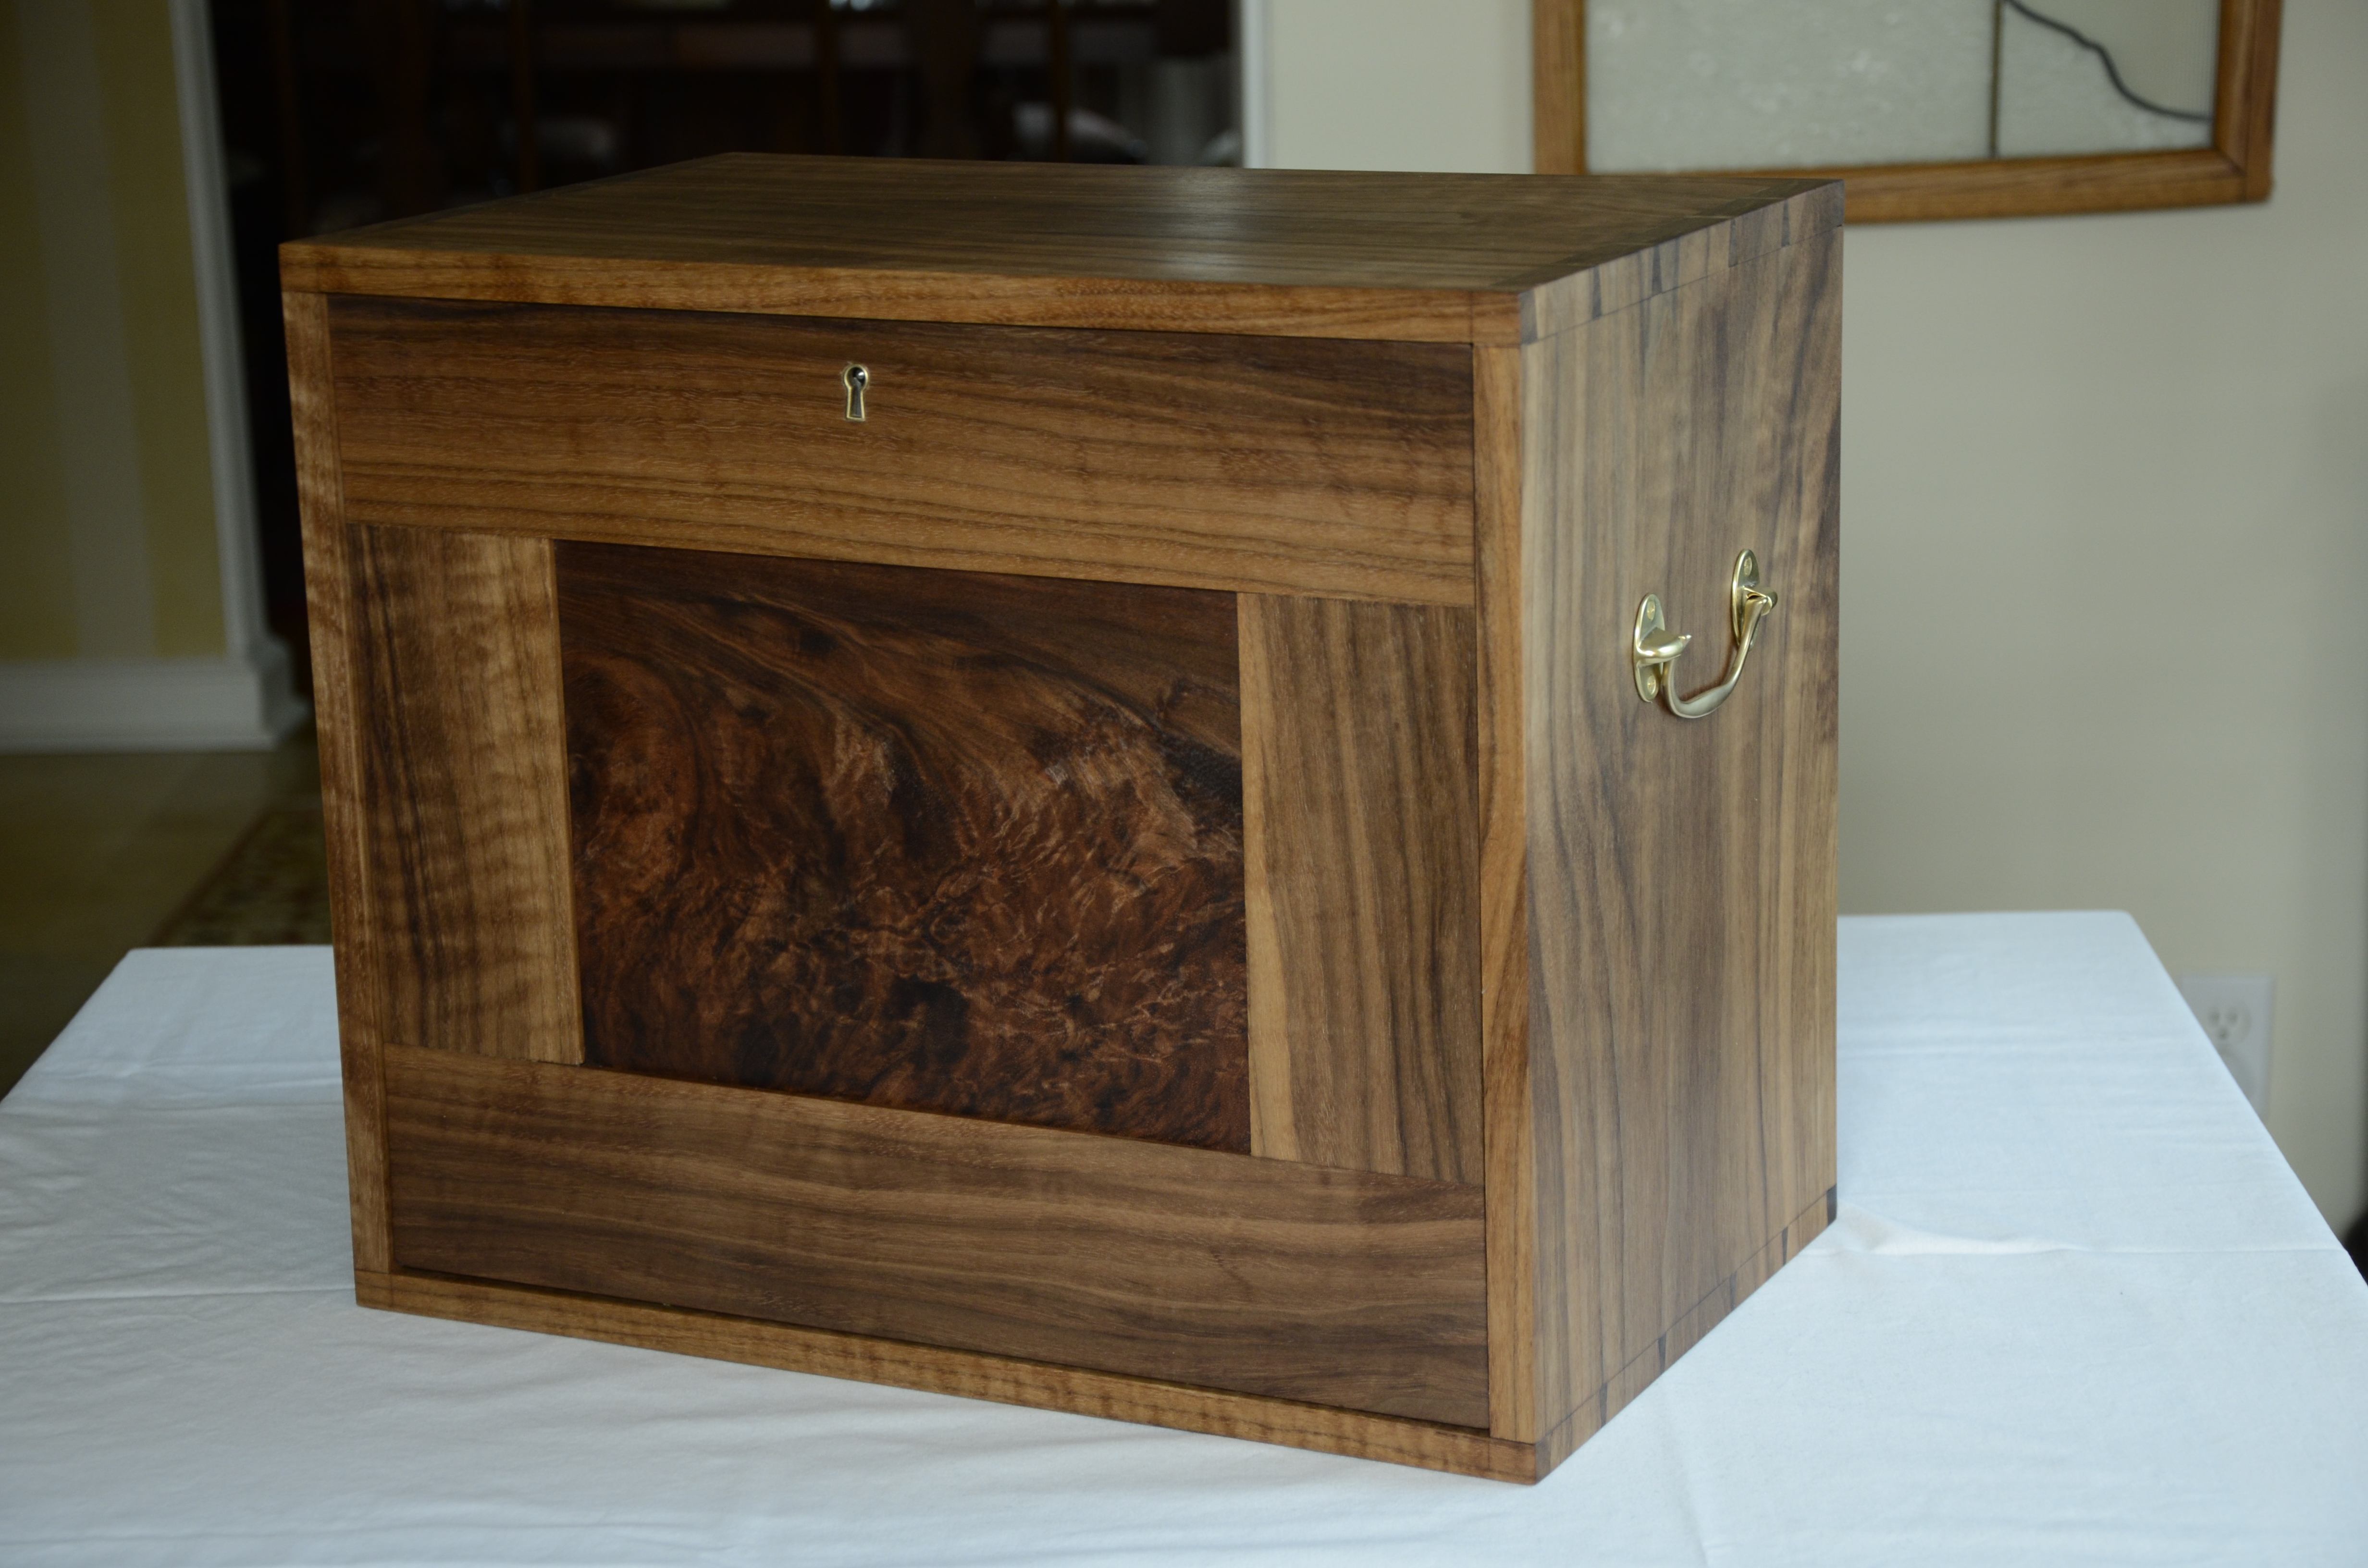
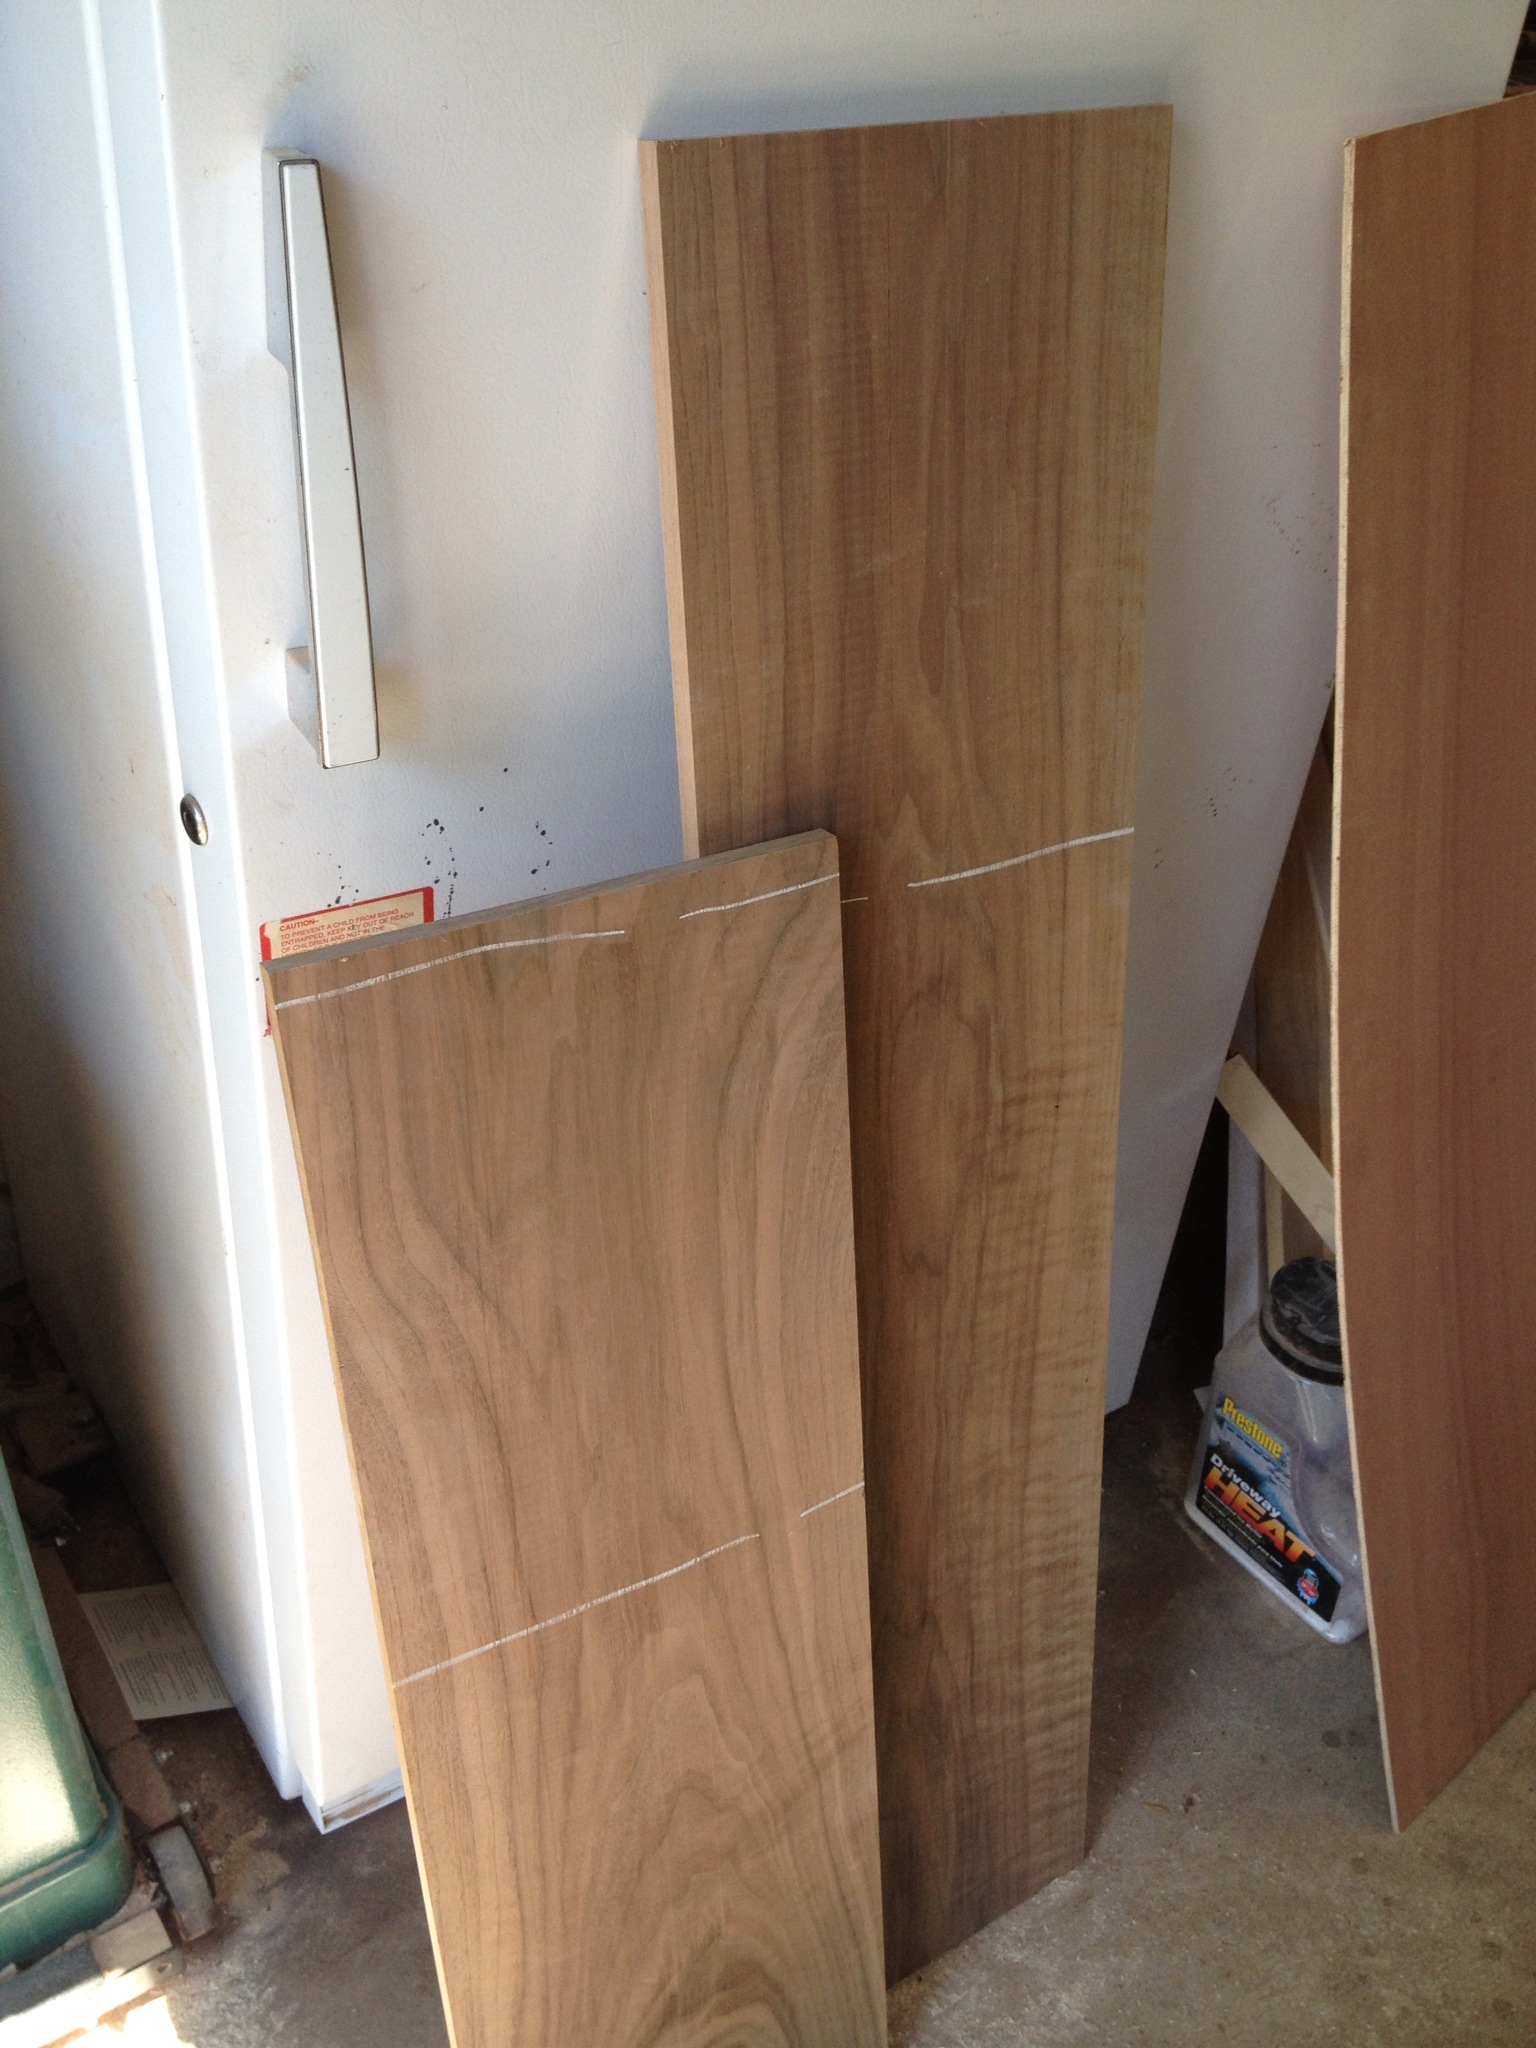
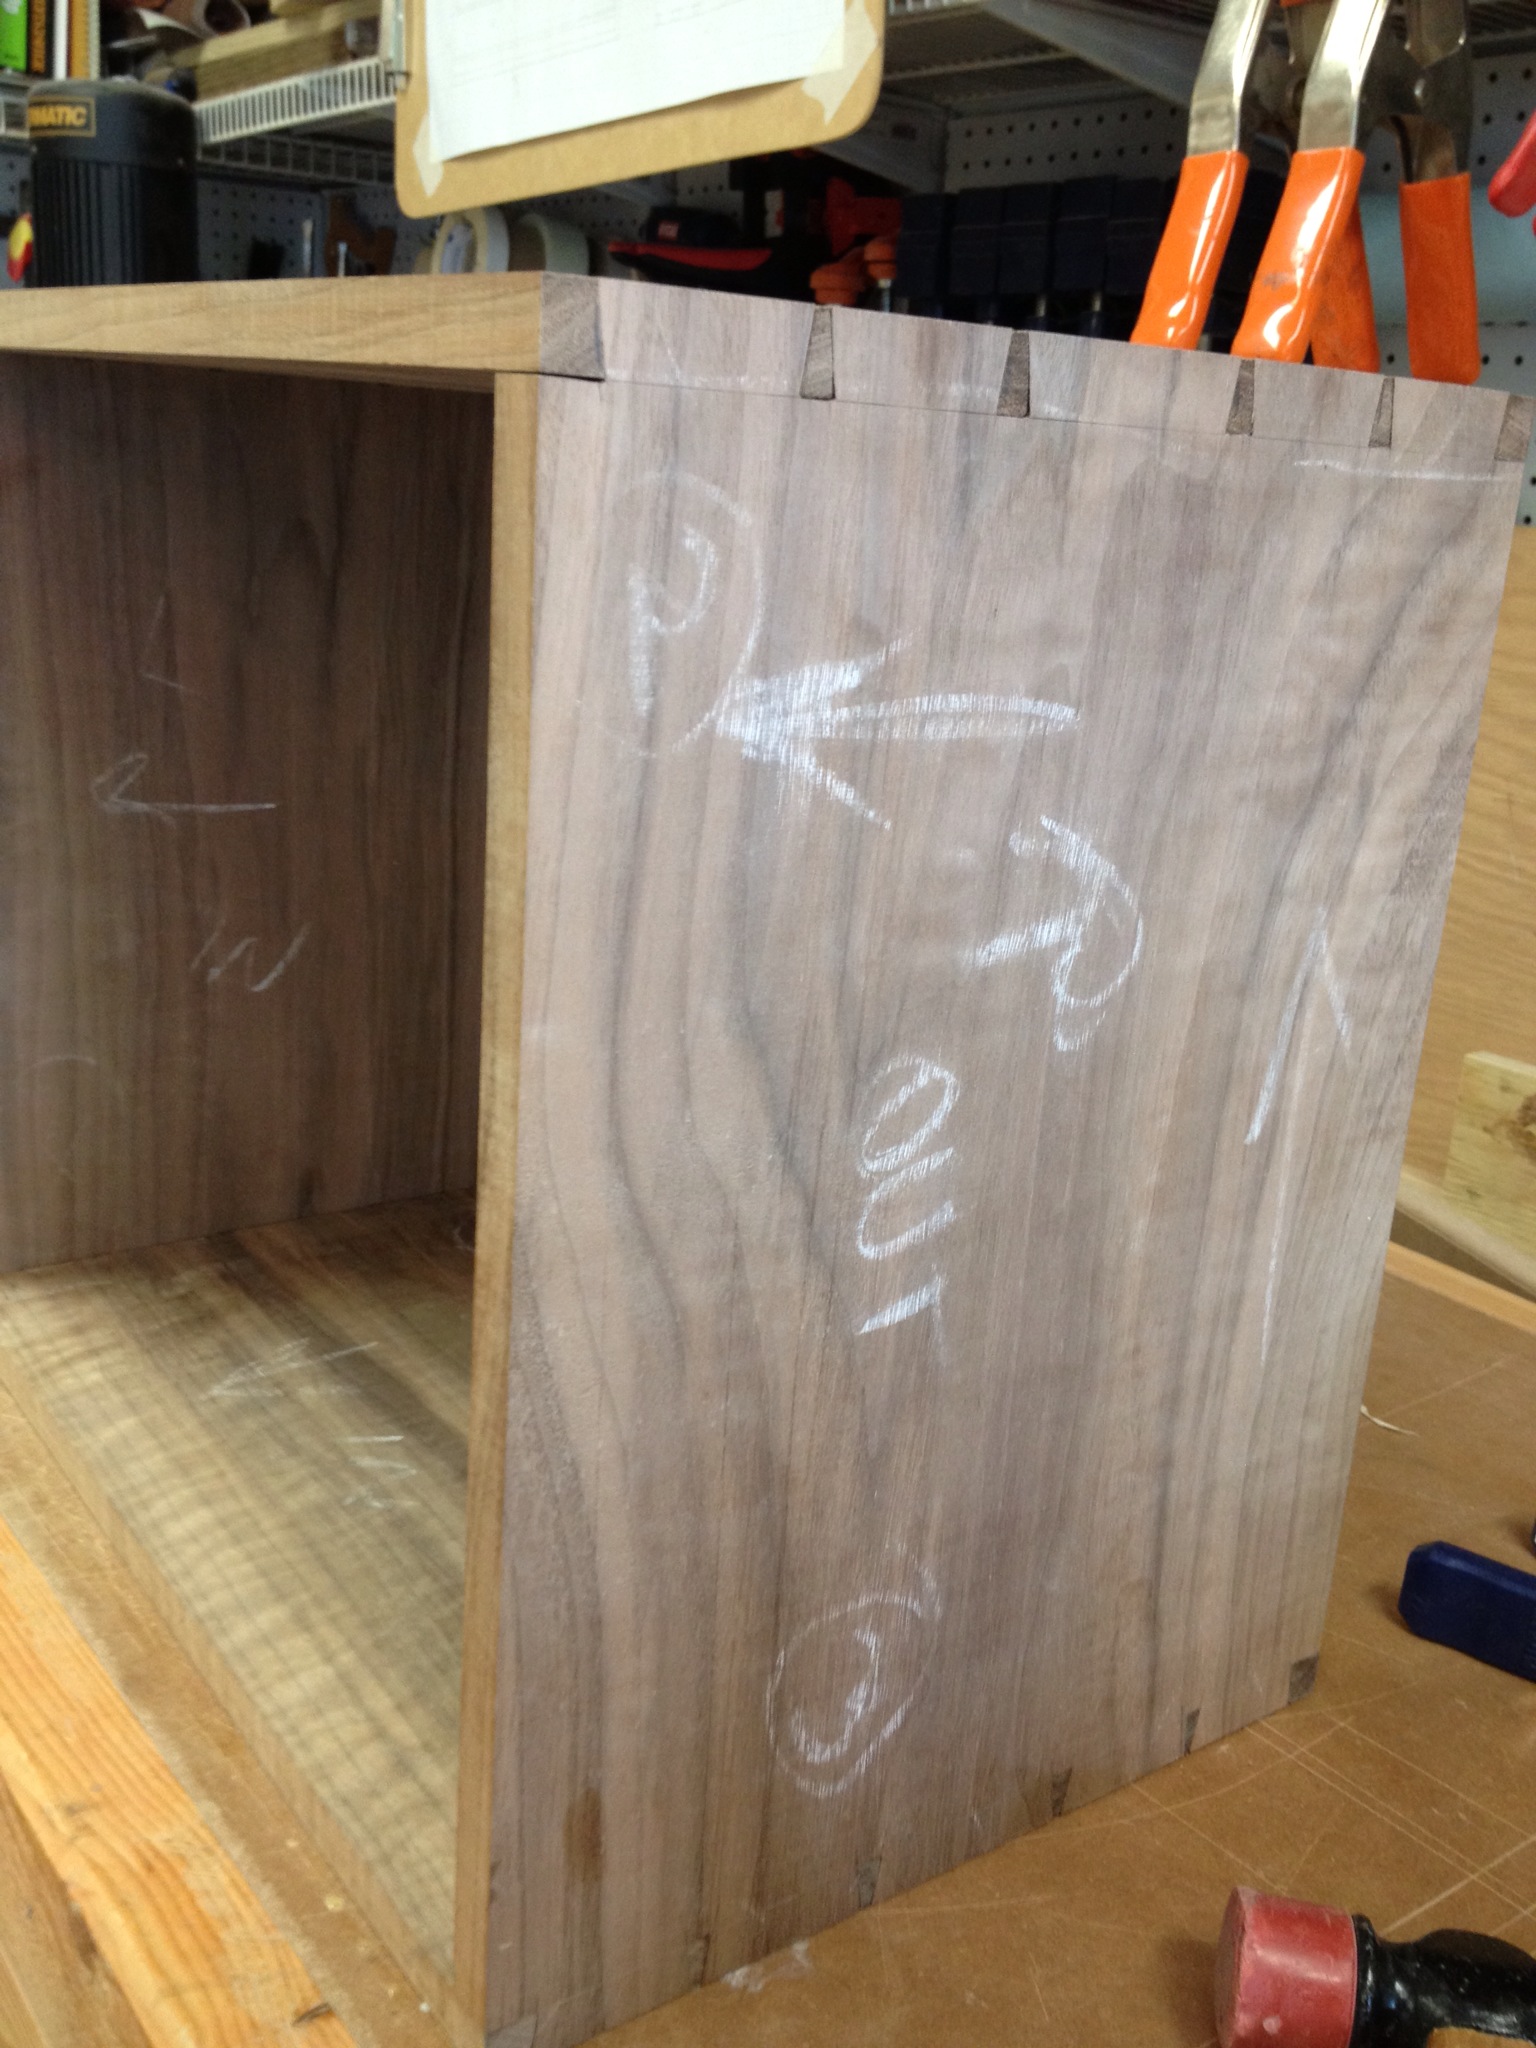
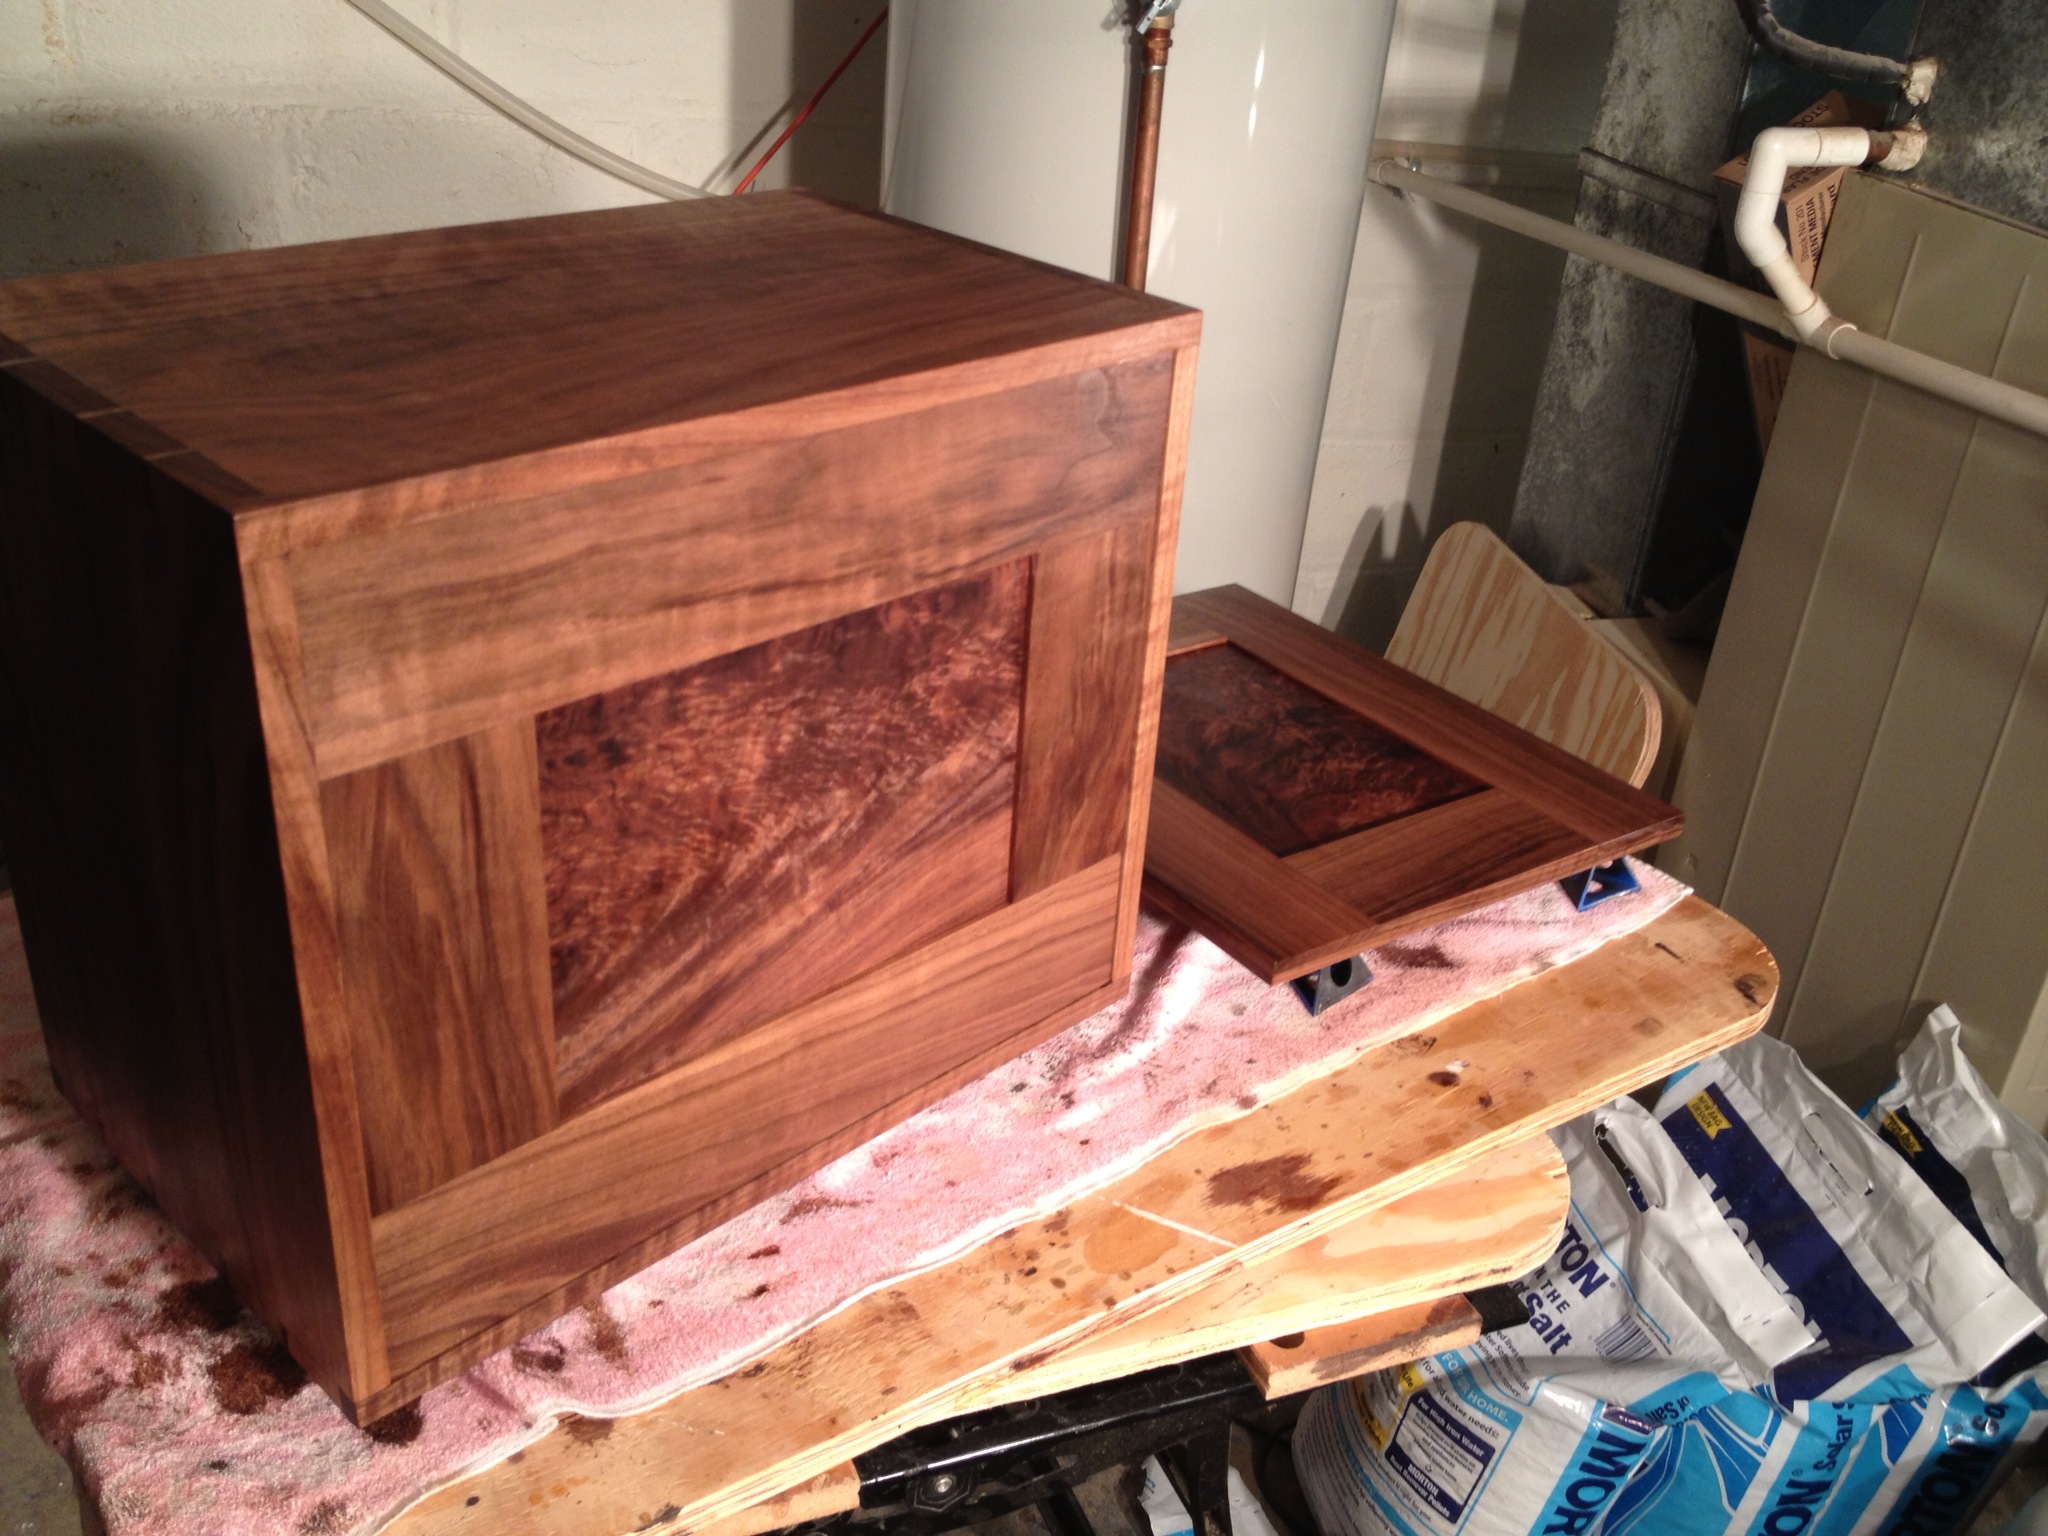
Now, on to the actual piece. I went in search of wood and found a 4/4 by 12 inch piece of walnut for the case that had some great figure – good color and some ‘curl’ and the bird’s eye maple I needed for the drawers. Once again, I found great wood from Board and Beams in Fairfield, NJ. I haven’t worked with walnut before, but it is a joy. I found the best stretch of the board for the sides and top – all in one line so there is a grain match from the side, over the top and to the other side. I cut the dovetails for the case, and, while I’m still learning, I’m getting better, especially at cleaning up any gaps after the fact!
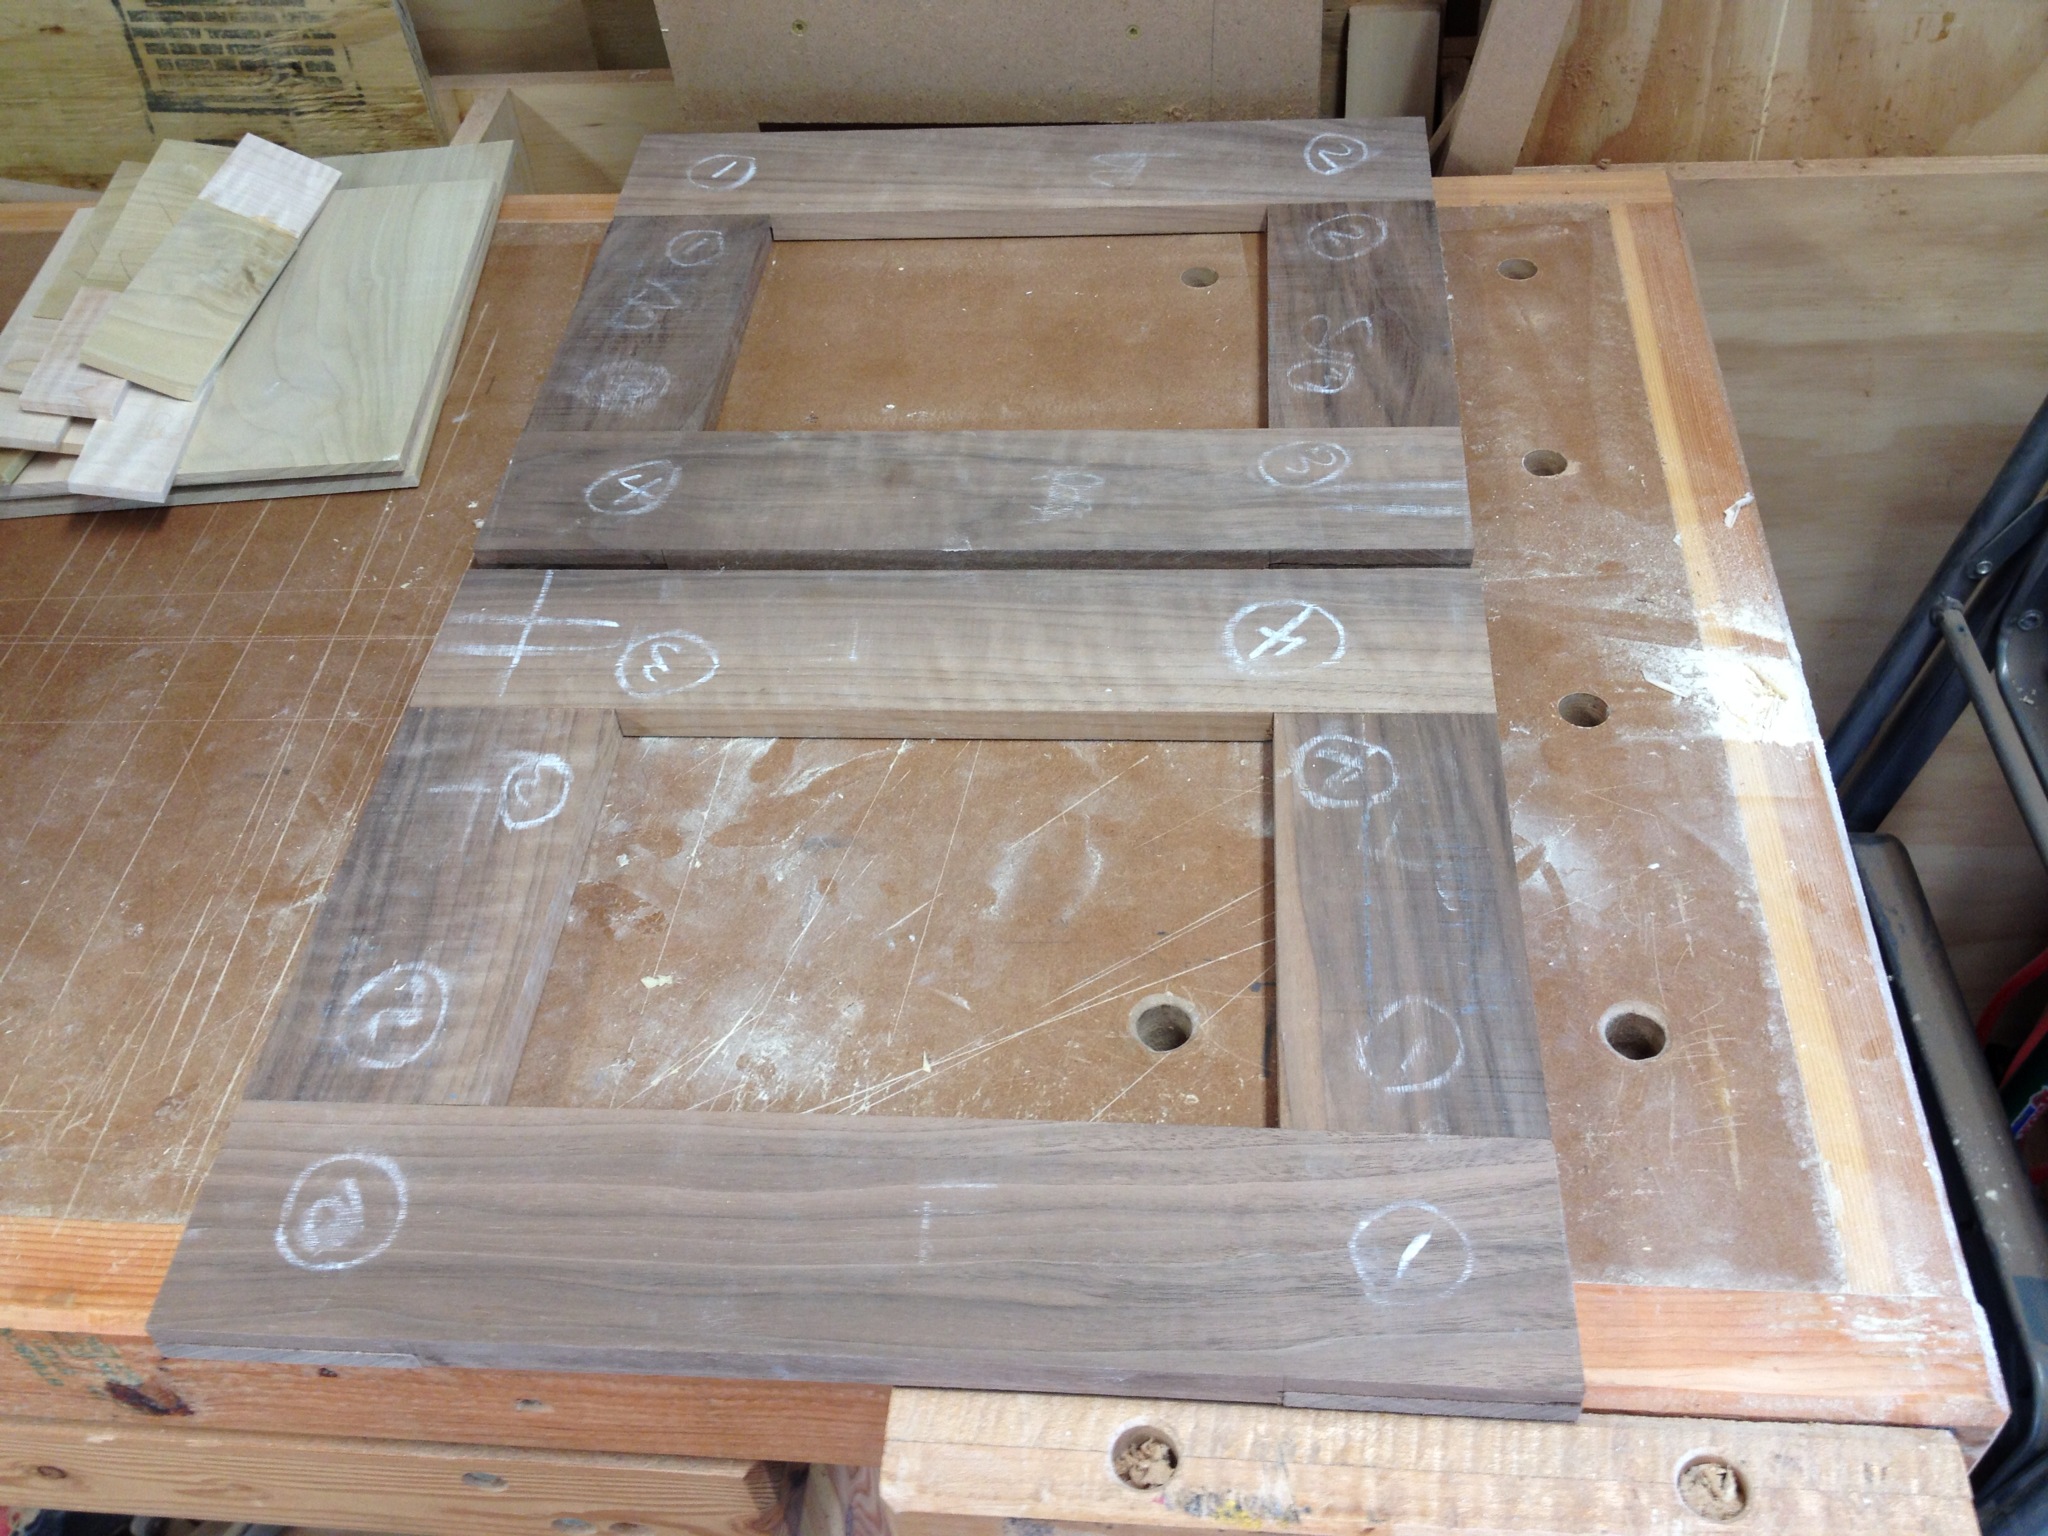
I used simple half-lap joints for the front and back because I like seeing the joinery. The panels are veneered with some spectacular walnut crotch I found at Veneer Supplies. I applied the veneer using my Roarockit vacuum press – great, inexpensive vacuum setup for small panels.
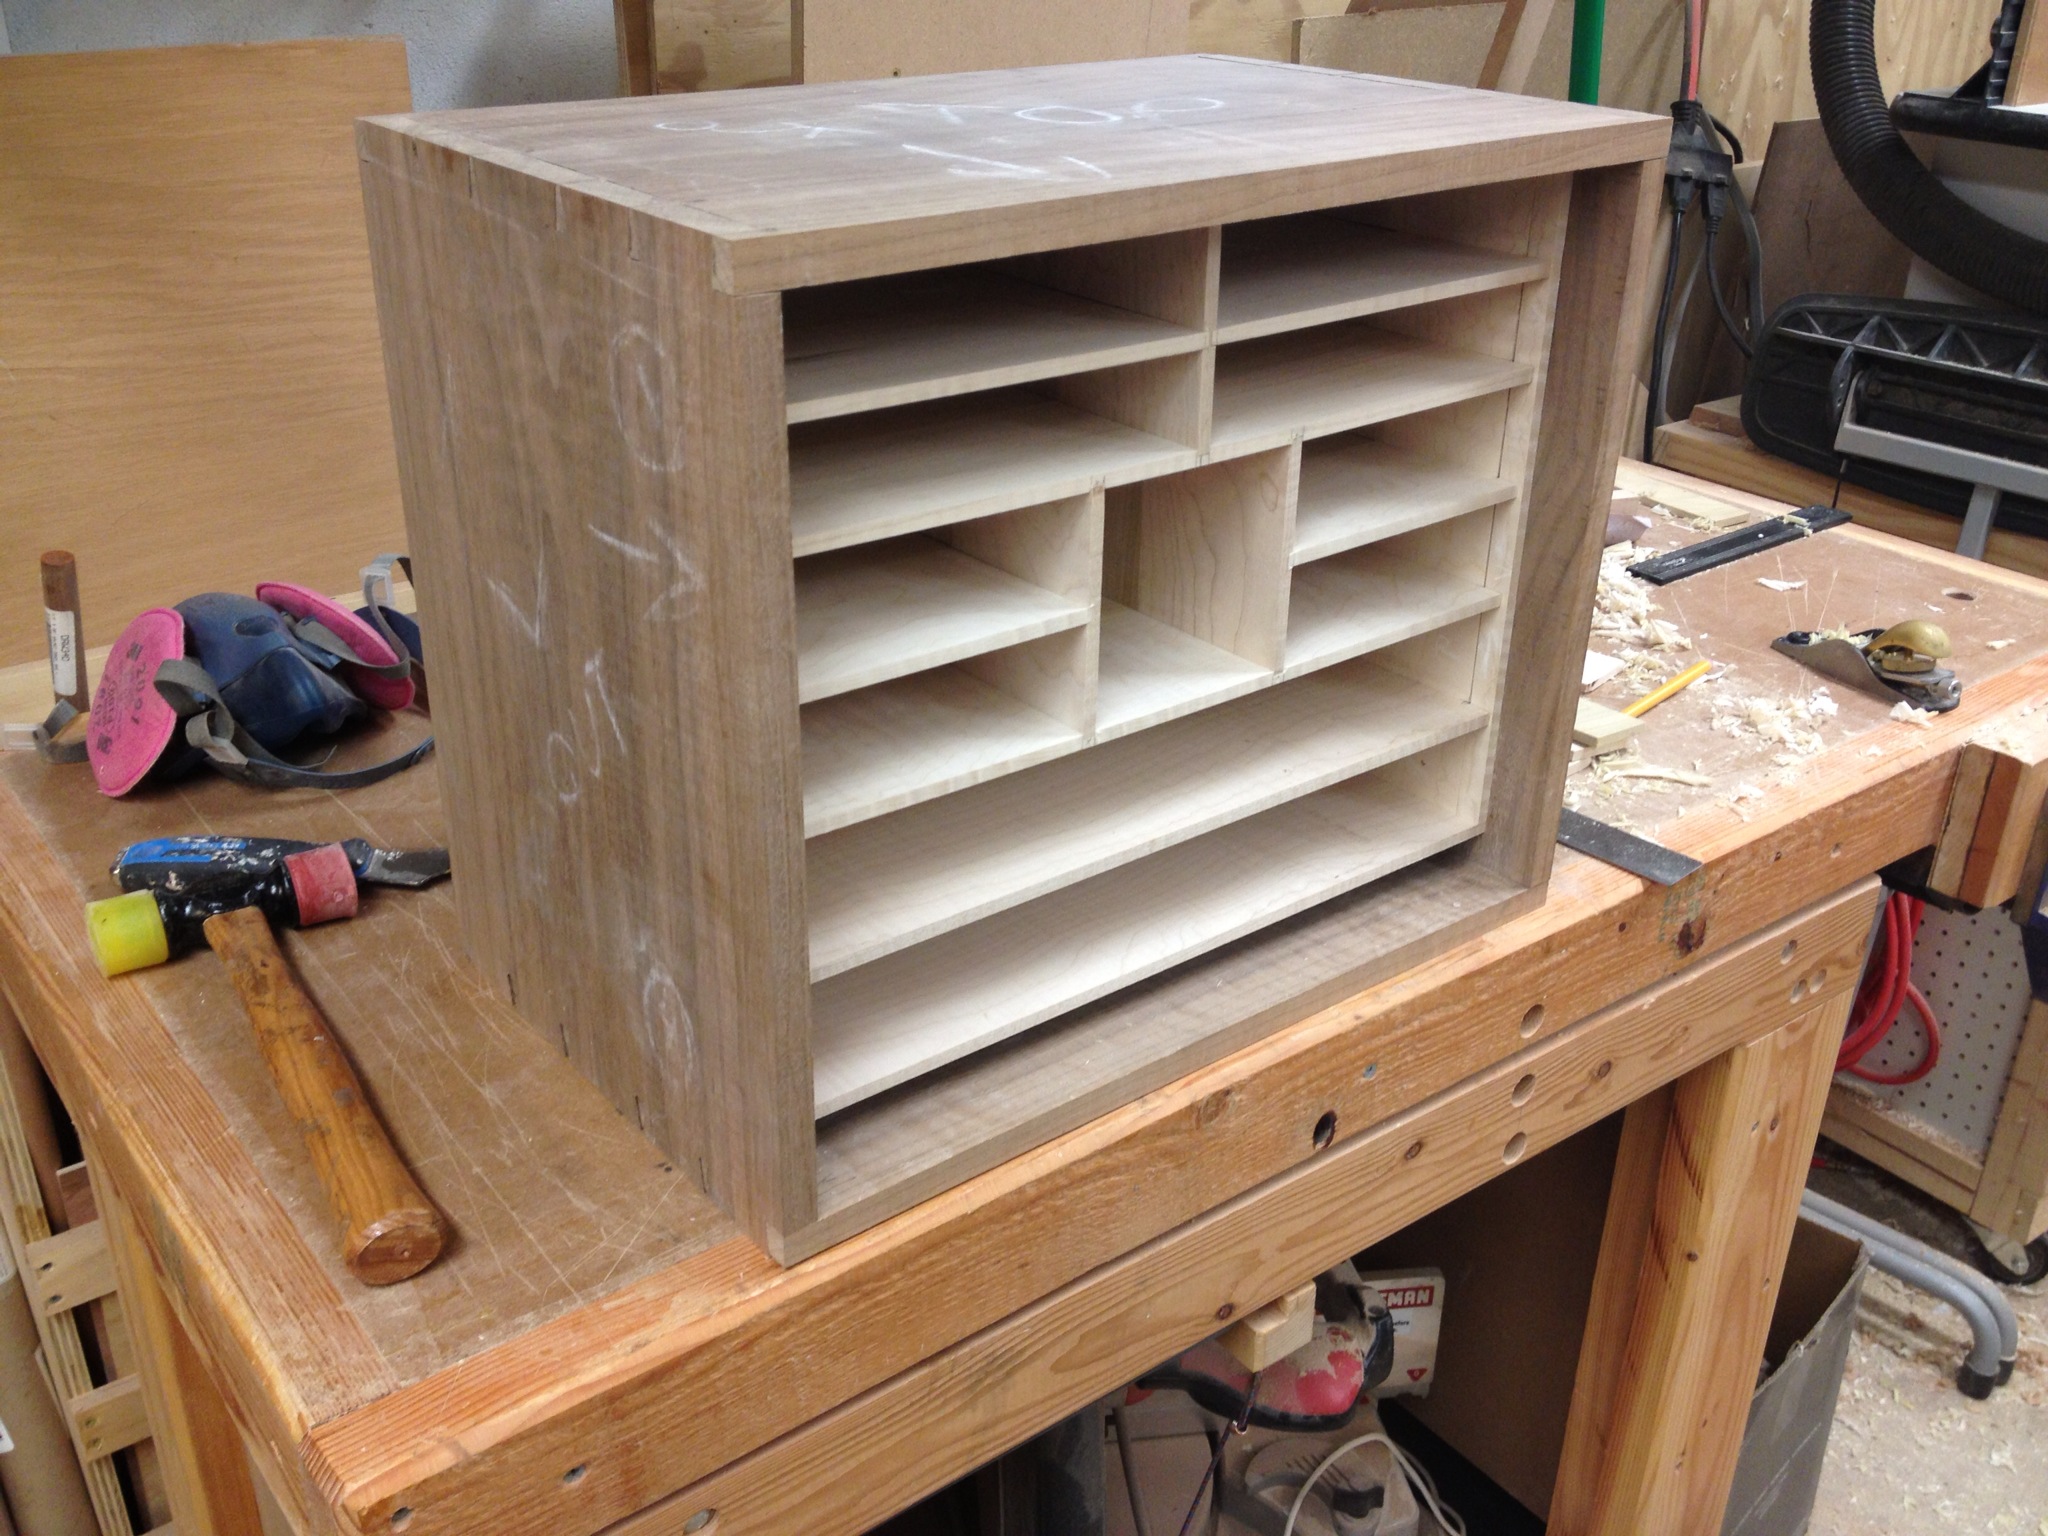
Next came making the maple gallery and drawers, which went quickly given the work on the prototype. I put the drawers together with rabbit joints since they are small and won’t take much abuse. The drawer bottoms are plywood which will be strong and stable and covered with felt. I don’t like the look of the nylon-polyester-whatever cheap felt you see so much of and a little research produced natural wool felt – harder to find, more expensive, but much nicer to my eye.
The door has two brass pins along the bottom that fit a couple of brass sleeves fit into the case. The pins slip into the sleeves and the door swings in at the top to be locked. I was apprehensive about fitting the lock, since I hadn’t done that before, but I’m finding I’m learning my way with a sharp chisel and, again, the practice on the prototype was invaluable.
I definitely wanted a finish that would show off the wood. A new product came out a year or two ago called Masterpiece Wood Finish, from Highland Woodworking in Atlanta. Its a 3-part finish process – a basecoat made with special oils that penetrate to seal the wood and enhance color and grain.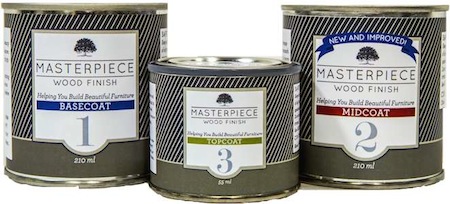 A mid-coat blend of oils and waxes fill the wood’s pores and a top coat paste wax for additional sheen and luster. I did a test finish on a piece of walnut and it was beautiful, bringing out the color and grain of the wood, smooth as a baby’s you know what and really easy to apply. Definitely not for a table top or ‘hard use’ situation, but great for this. For the drawers, I used a clear shellac for a little shine to highlight the maple.
So…done and done…Happy Birthday Jason!
Jason’s Chest
It’s gonna be a case….

Fitting the dovetails
I made a box!
The front and back panels
The front with walnut crotch veneered panel inset
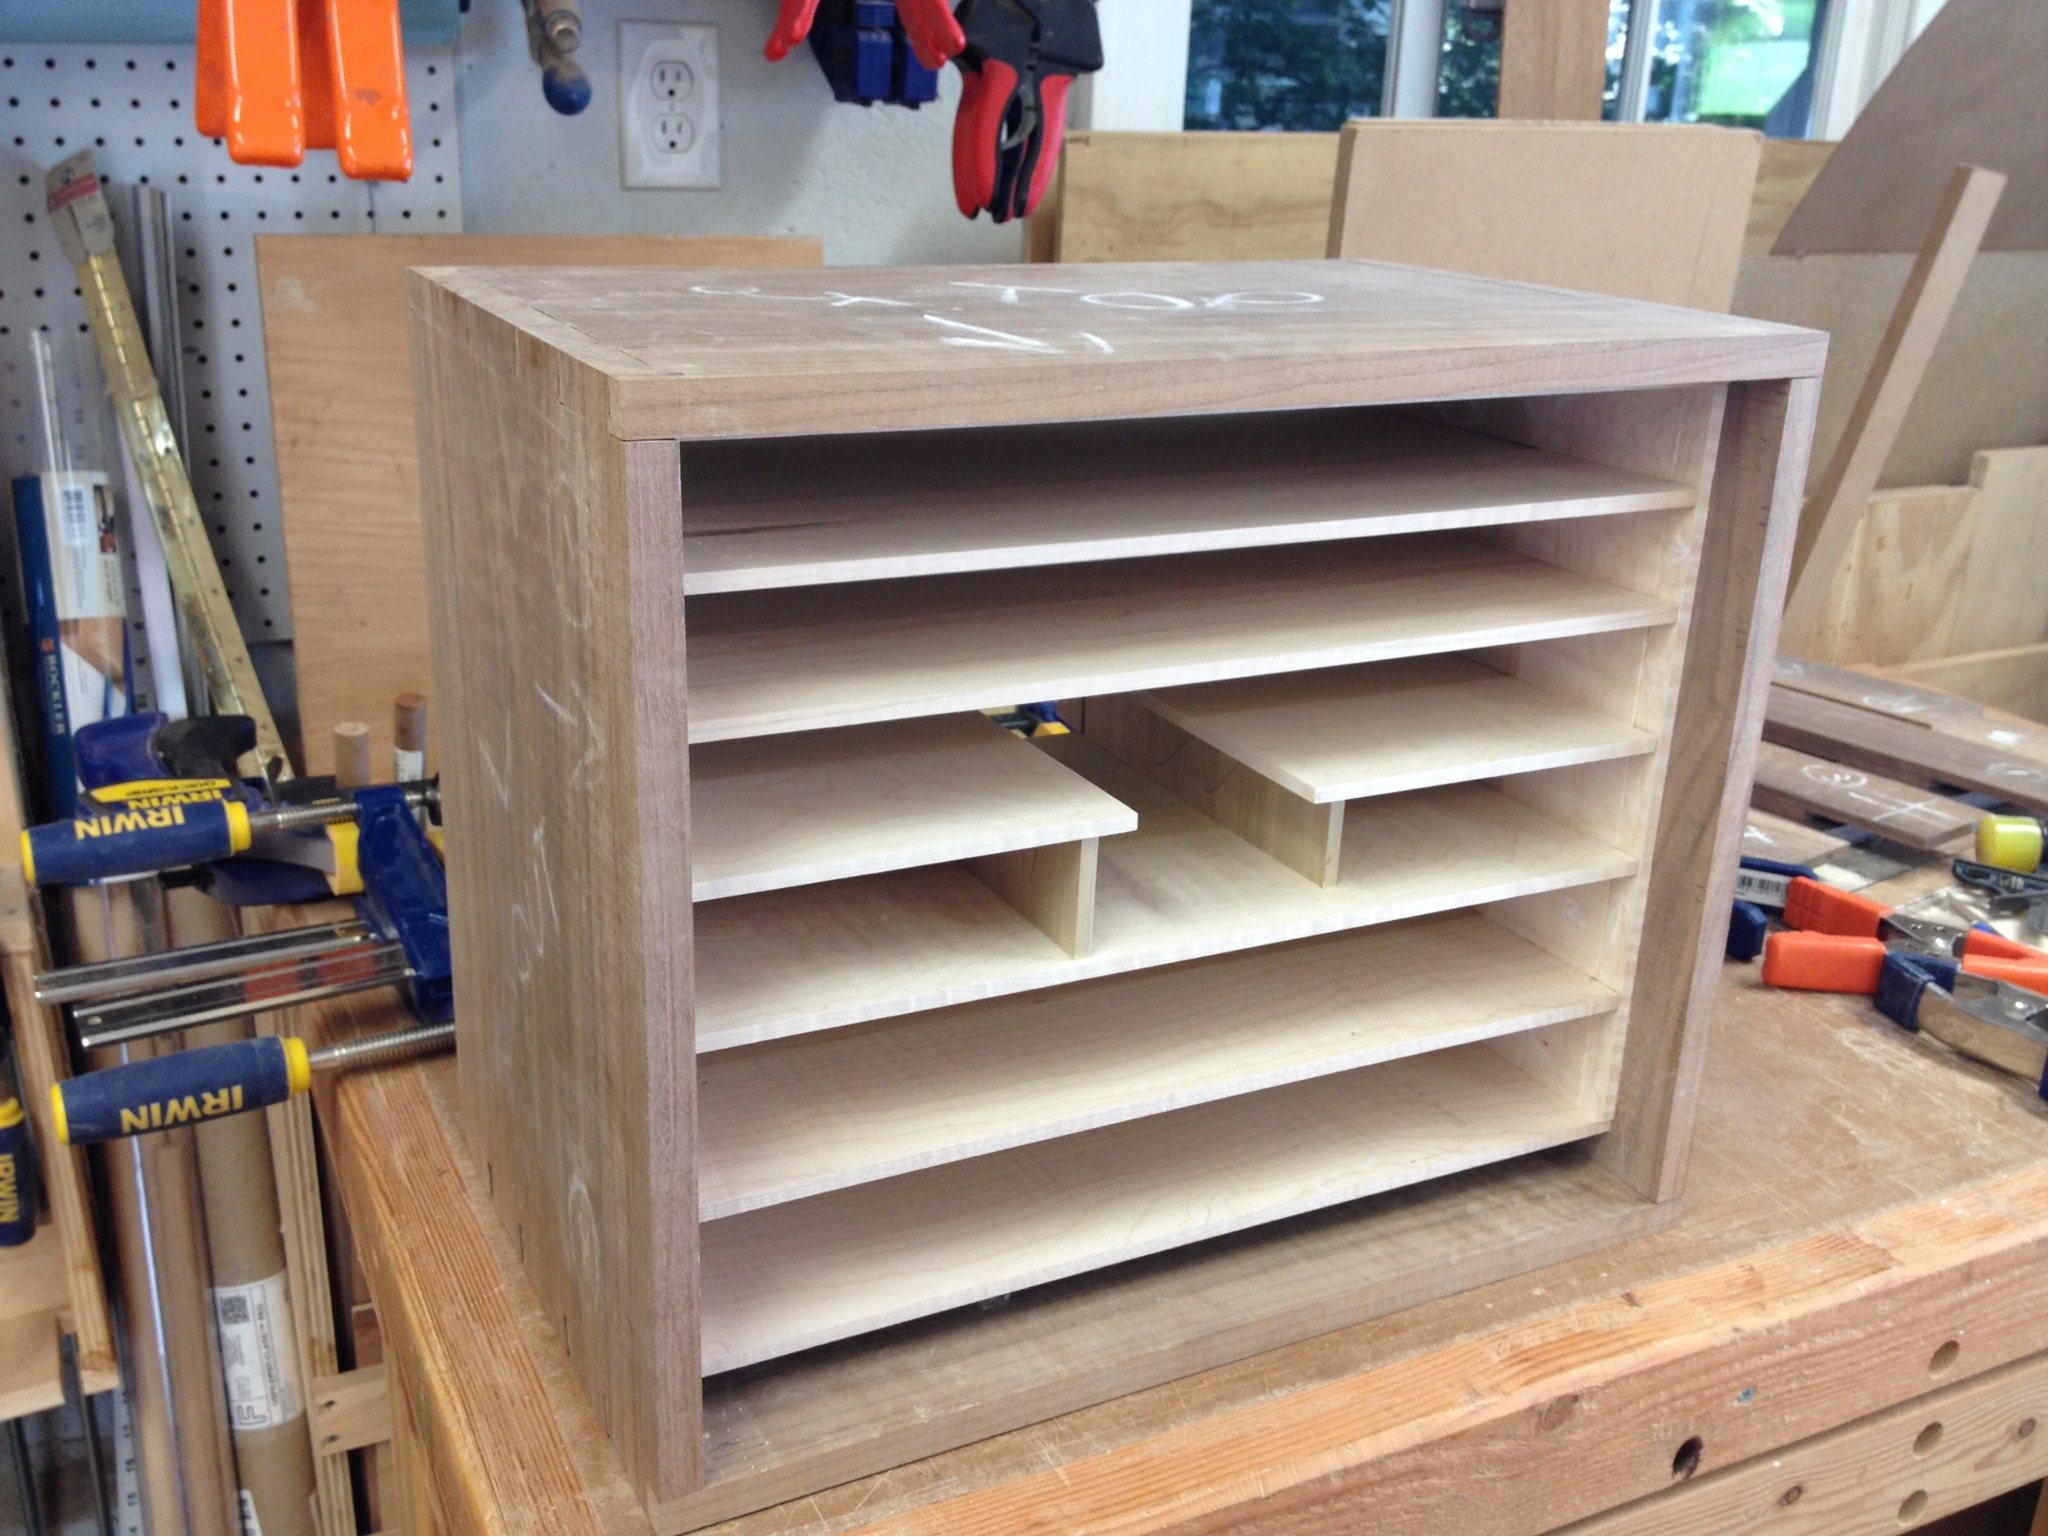
Fitting the drawer gallery
All it needs now is some drawers
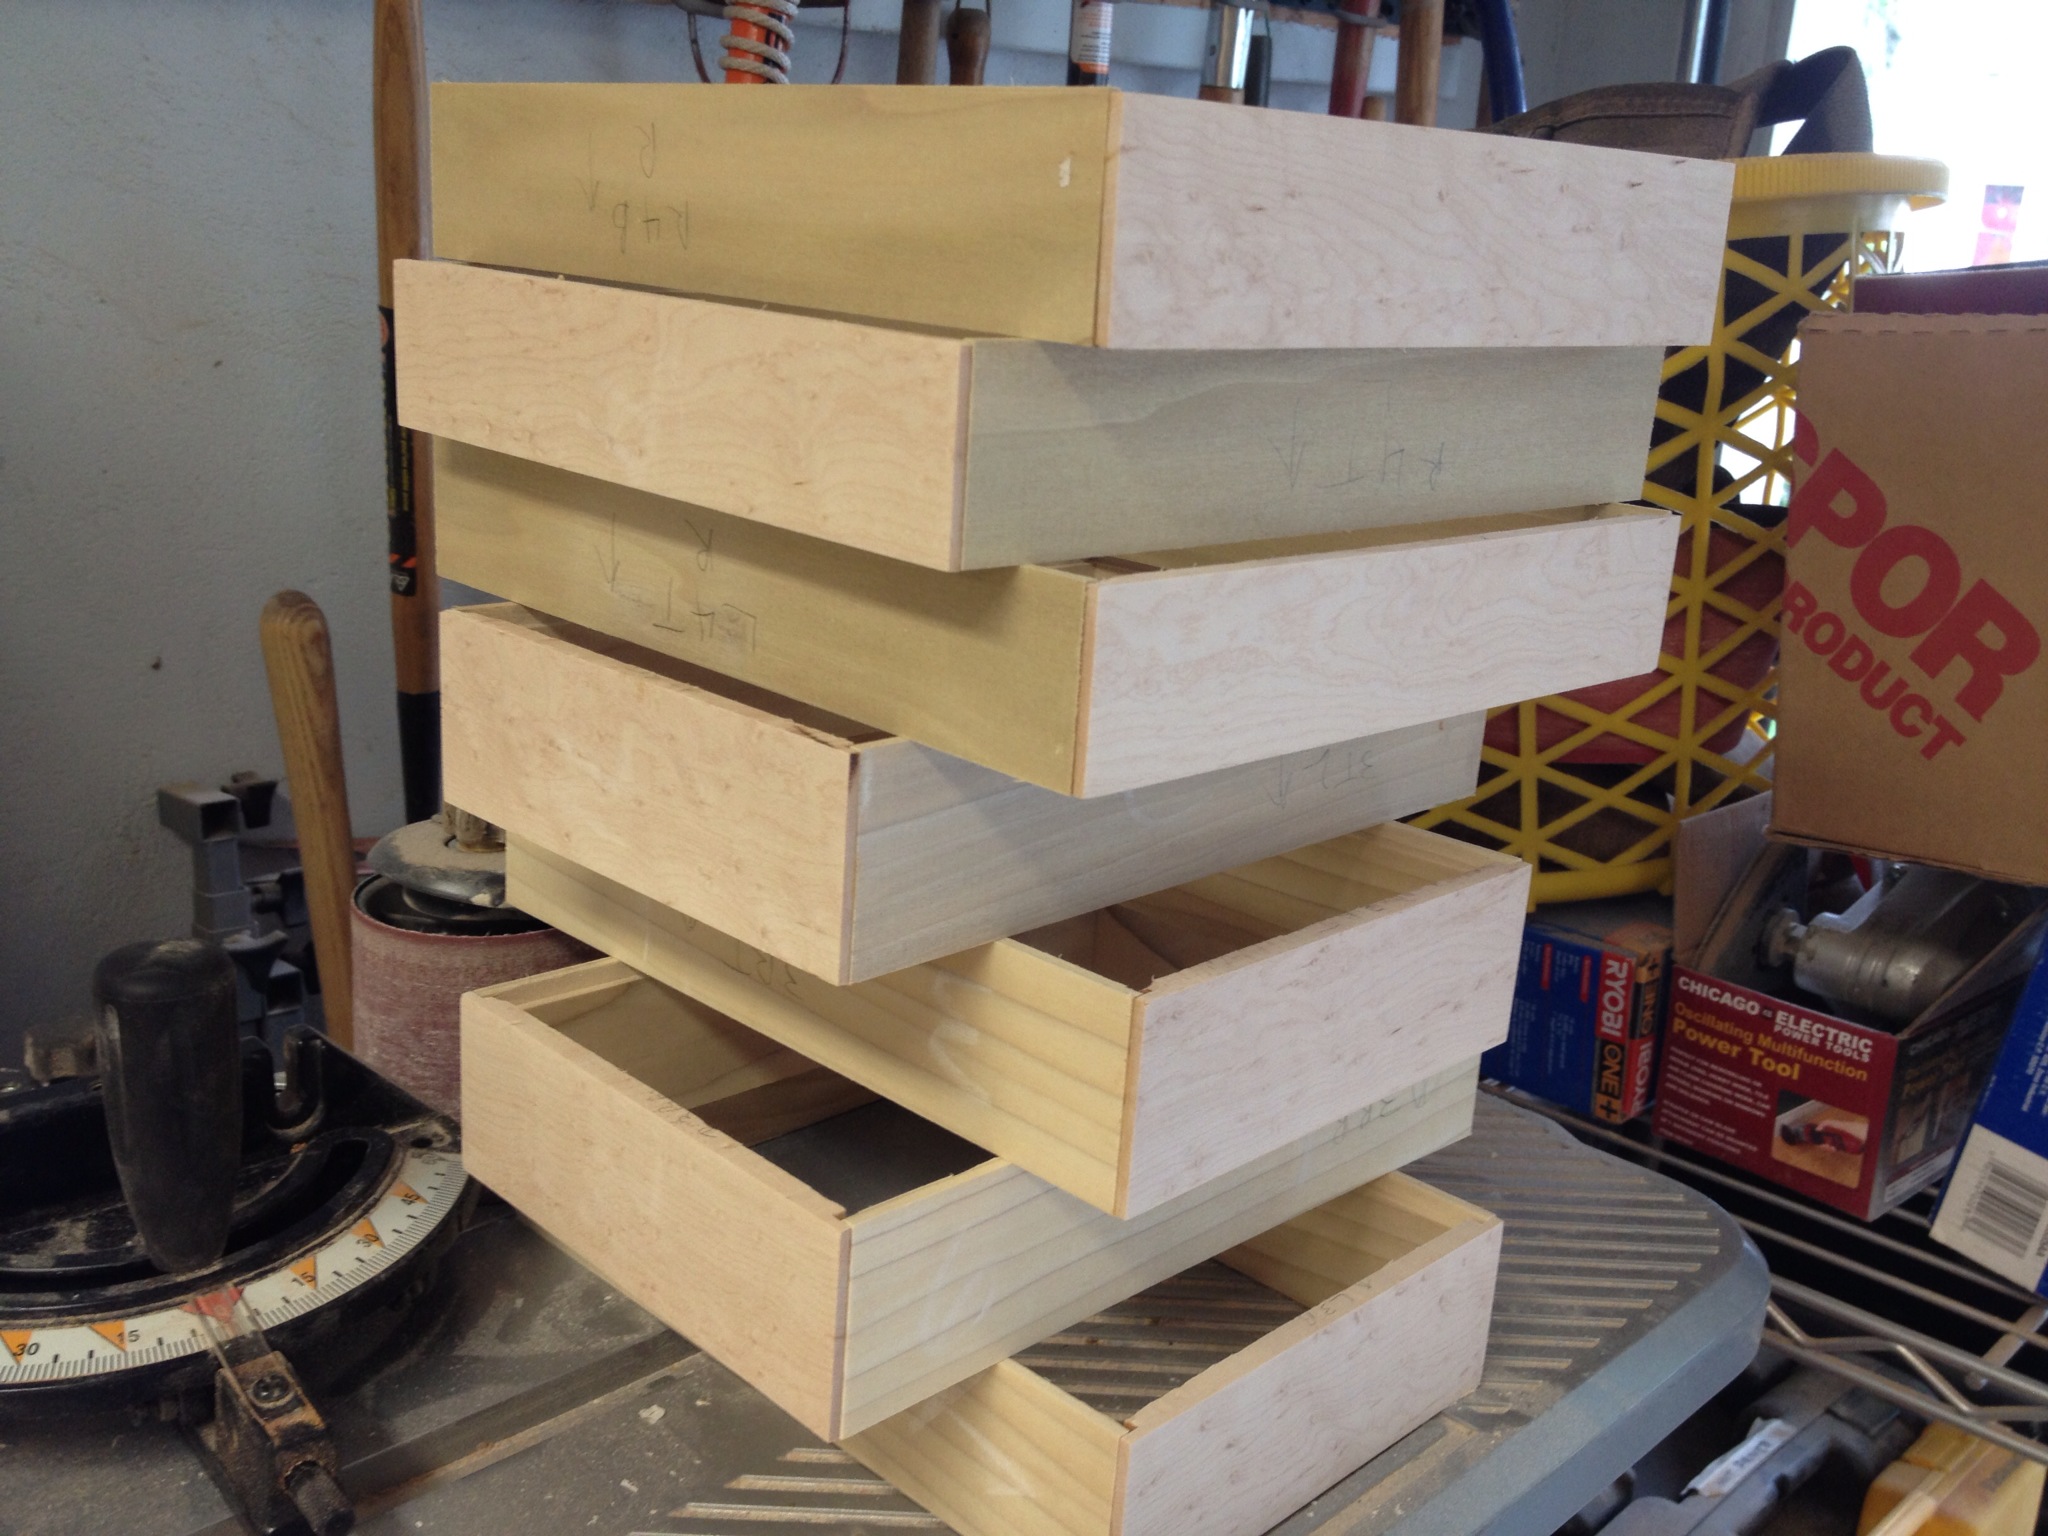
A pile of drawers
The gallery is full
A couple of coats of oil and it’s alive
The front with keyhole escutcheon…a ‘soft’ finish
The grain wraps around from side to top to side
I do love wood
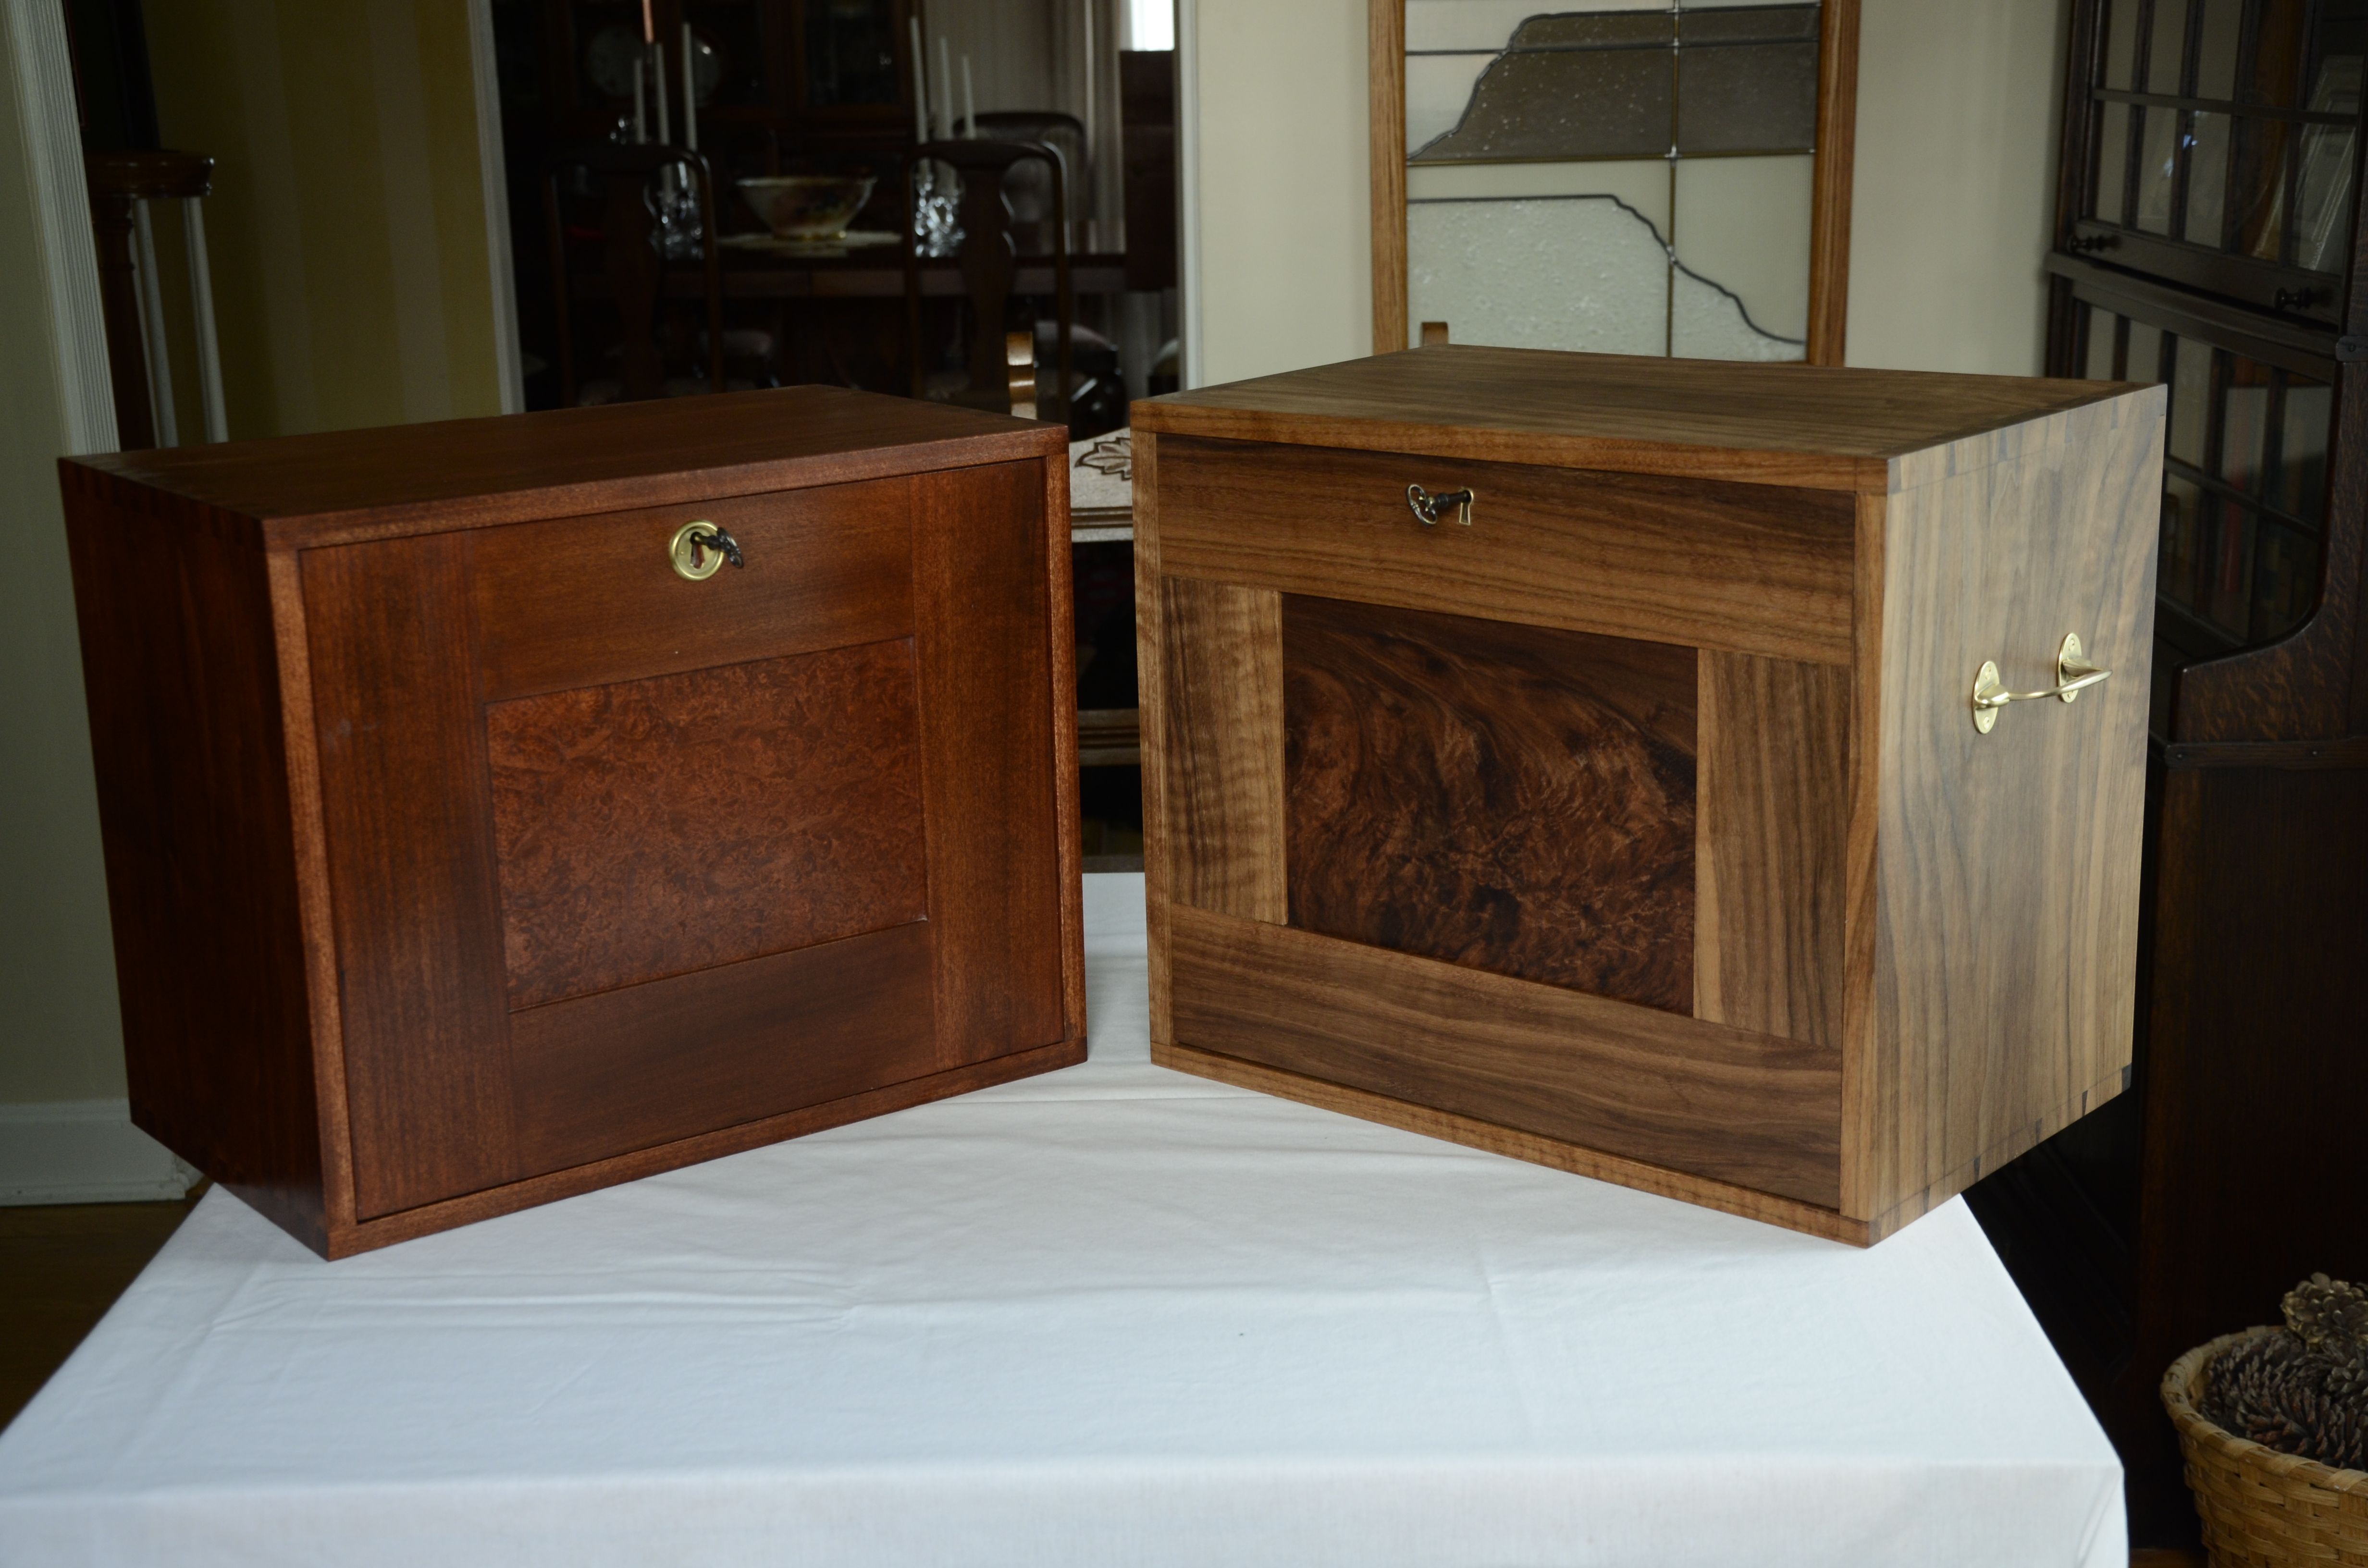
The prototype and ‘the one’

Siblings? Cousins?
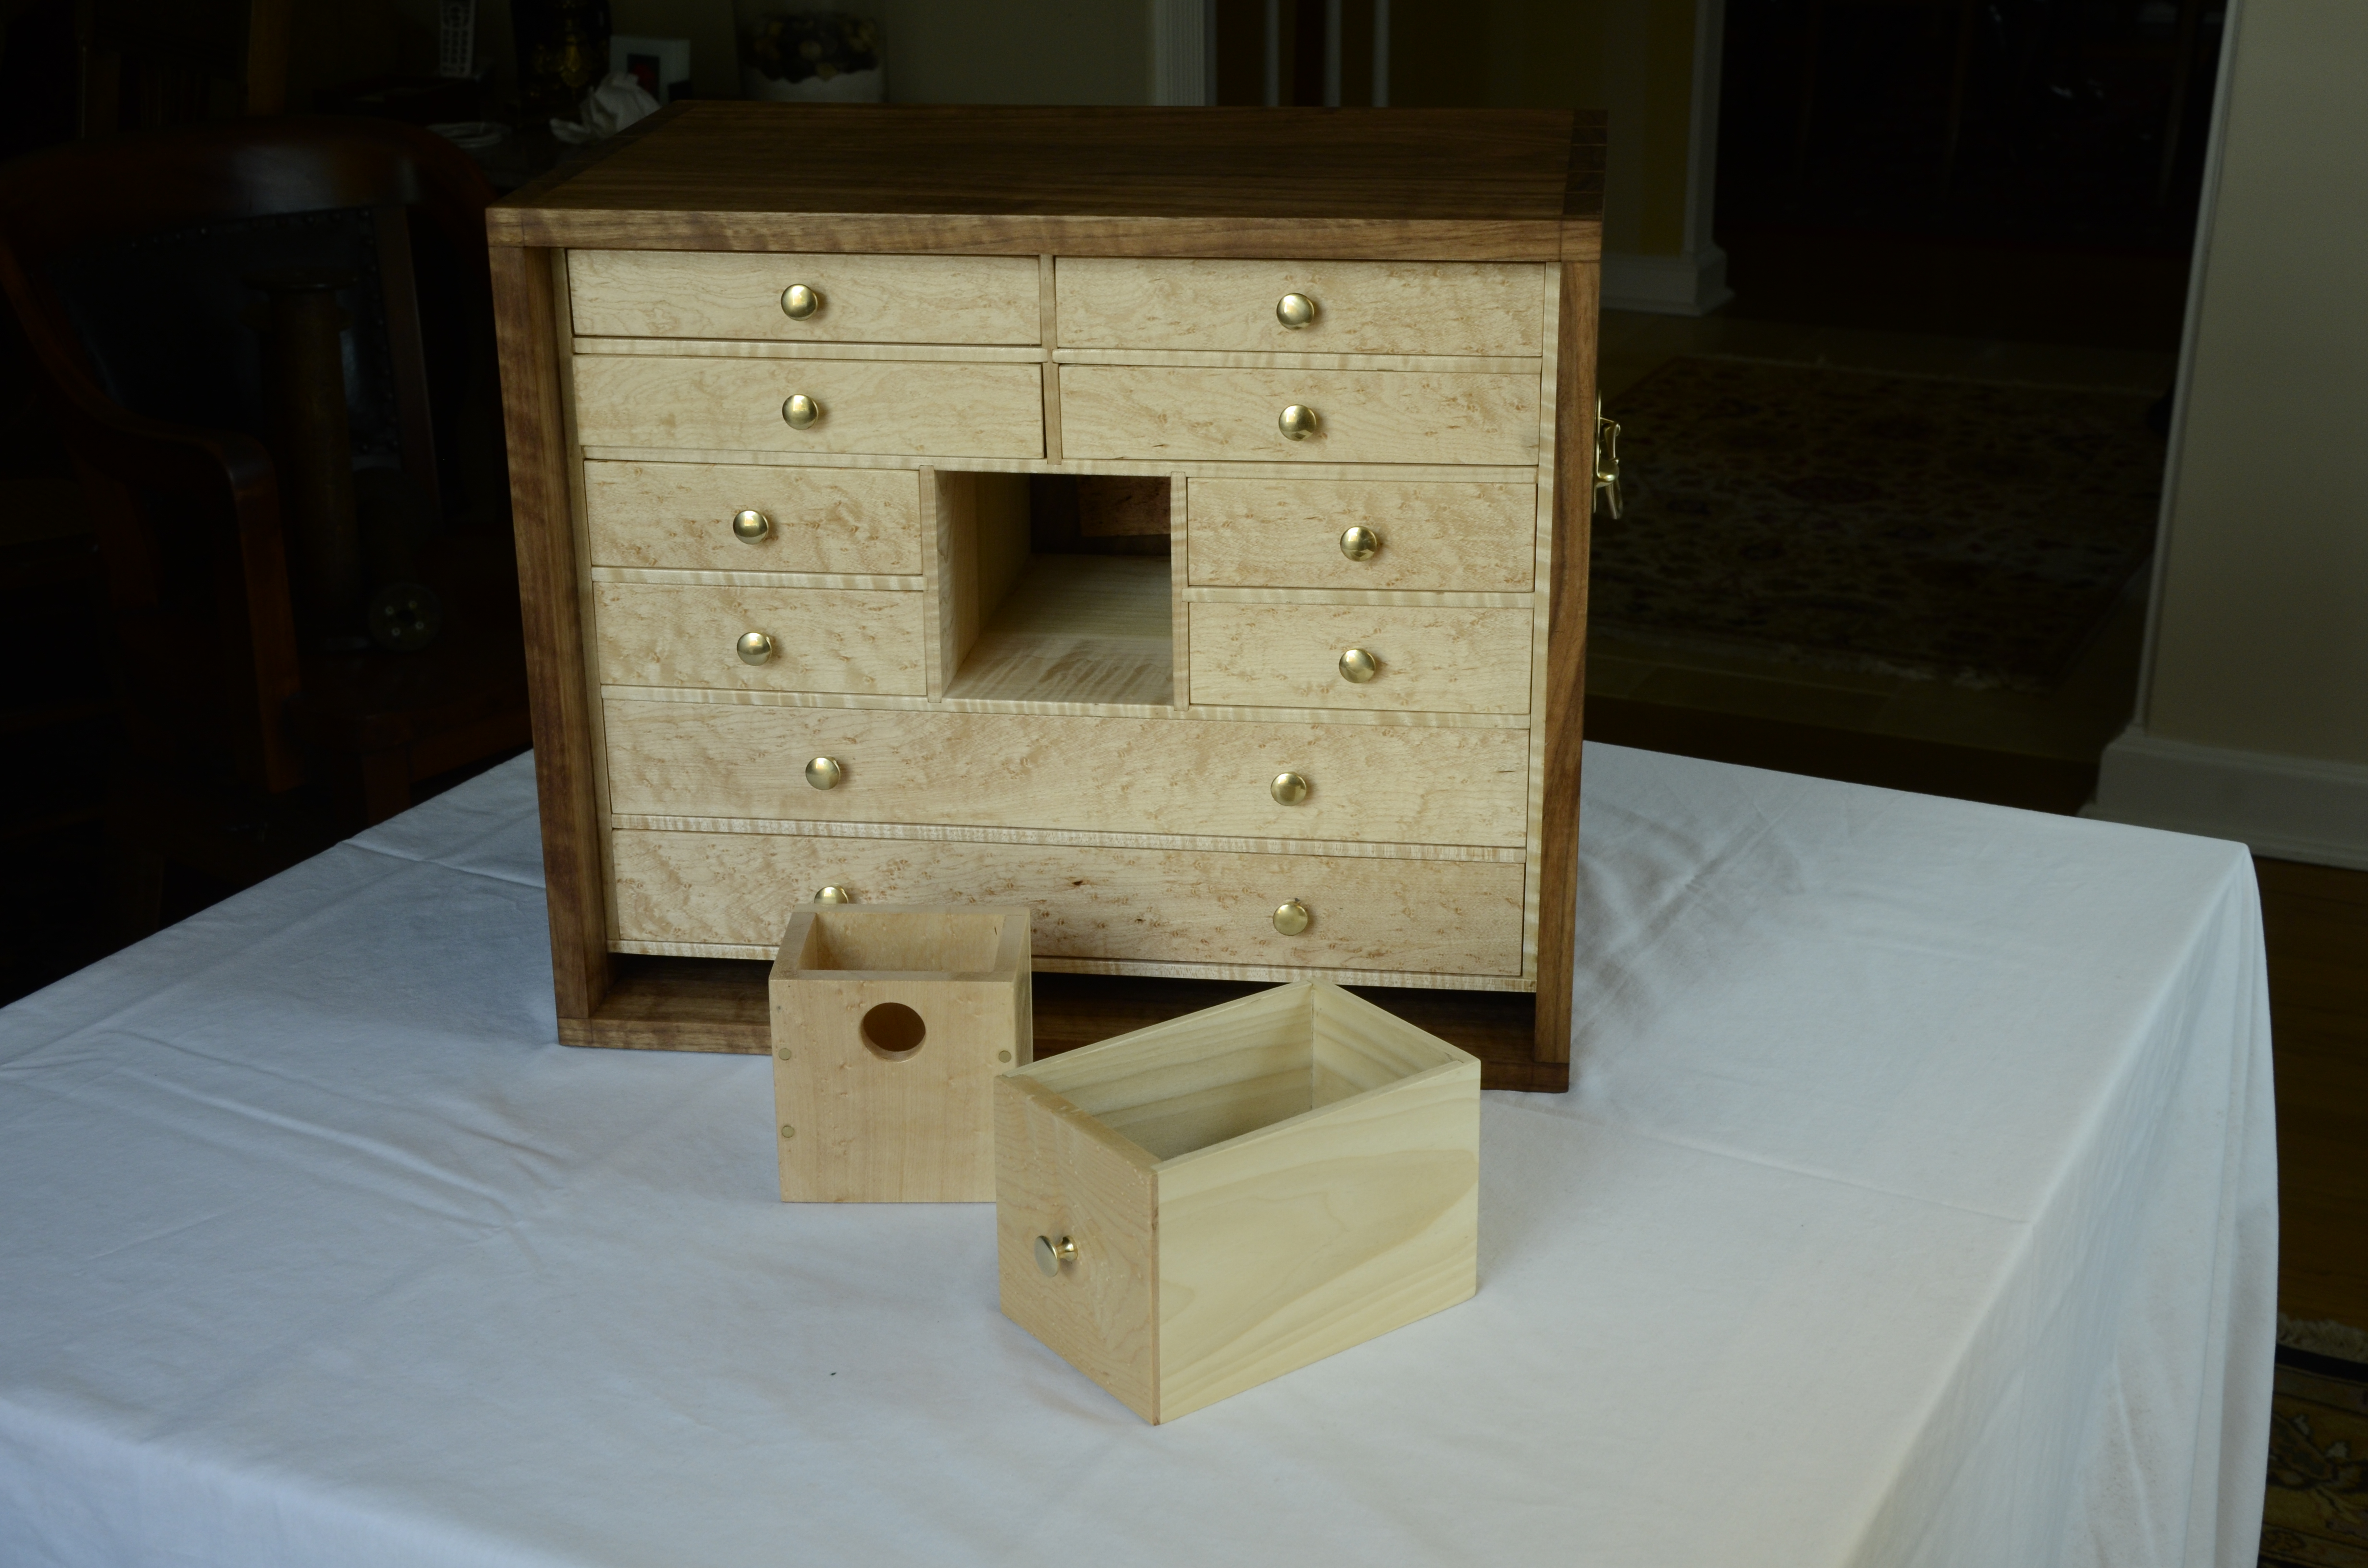
Secret drawer – don’t tell anyone

The chest is everything I envisioned and more! I can NOT wait to surprise Jason tonight with his early birthday present! 😀 He is going to LOVE IT!!! I hope you can keep up with the influx of orders you’ll be receiving from the amount of fb posts you’ll get from my shares 😉 Love you!!
Rusty this is amazing!
Dave- thanks…it was a lot of fun and a massive learning experience…Rusty
Hello Rusy
While I realize the odds of you answering this question is slim as you haven’t updated this site in a while, but I’ll keep my fingers crossed!
How did you attach the inner subassembly (drawer gallery) to the outer frame? I’m working on a similar project and I’ll need to do something similar but this has me scratching my head.
Hope you can answer!
Dan- no problem. Slid in from the back before the back was glued on. Glued it in – sides and top – I paid attention to grain direction on the gallery so that there should not be a problem with wood movement. Let me know if I can help with anything else….Rusty